Last Updated on 2 months ago by Grace Nyambura
Are you spending more time fighting NVivo than actually analysing your data? You’re not alone. Most PhD students I work with lose hours each week to unnecessary clicking, dragging, and hunting through menus — time that could go directly into finding themes and writing up.
The good news: NVivo has a set of keyboard shortcuts that eliminate most of that friction. In this article I’m sharing all 14 that I use regularly with the researchers I support. Whether you’re coding 10 interviews or 30, these shortcuts will cut your analysis time significantly without cutting any corners.
If you’re just getting started with the software, you may want to read my step-by-step guide on how to use NVivo for qualitative research before diving in.
- Why NVivo Shortcuts Matter for Qualitative Research
- Quick Reference — All 14 NVivo Shortcuts at a Glance
- Shortcut 1 — CTRL+A: Select All
- Shortcut 2 — CTRL+X and CTRL+V: Cut and Paste
- Shortcut 3 — CTRL+Z: Undo
- Shortcut 5— CTRL+F2: Code a Selection
- Shortcut 6— CTRL+SHIFT+O: Open and Reveal a Code
- Shortcut 7— CTRL+F8: Code In Vivo
- Shortcut 8 — CTRL+SHIFT+F2: Un-code a Selection
- Shortcut 9 — CTRL+SHIFT+N: Create a New Code
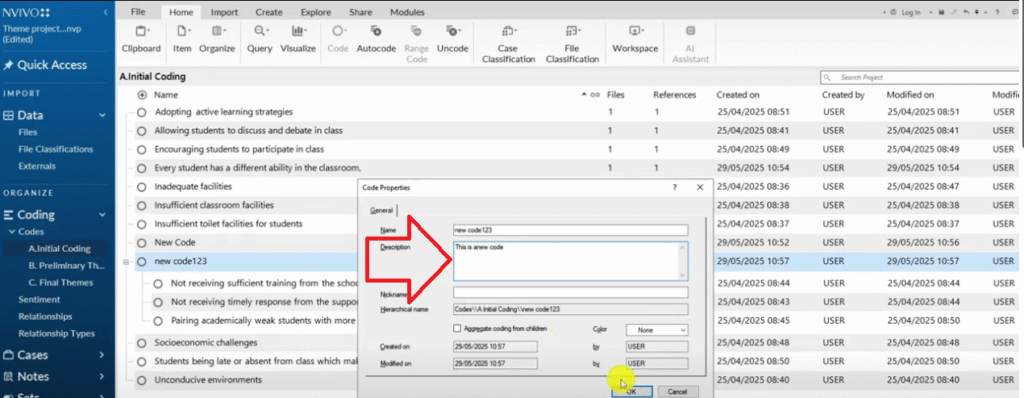
- Shortcut 10 — CTRL+SHIFT+P: View Code Properties
- Shortcut 11 — CTRL+SHIFT+A: Annotate
- Shortcut 12 — CTRL+E: Edit a Transcript
- Shortcut 13 — CTRL+SHIFT+E: Export a Visualisation
- Shortcut 14 — CTRL+P: Print and Export a Coded Document
- Frequently Asked Questions
- Key Takeaways
Why NVivo Shortcuts Matter for Qualitative Research
Qualitative coding is repetitive by nature. You read a passage, highlight it, assign it to a code, move to the next passage, and repeat — sometimes hundreds of times across a single project. Every time you reach for the mouse to do something your keyboard could handle, you’re breaking your concentration and slowing down.
According to Lumivero’s official NVivo documentation, NVivo is designed to support iterative, flexible analysis — and the keyboard shortcuts are built into that design. Using them consistently means you stay in a coding flow state longer, make fewer errors, and finish your analysis faster.
These shortcuts apply to NVivo on Windows. Mac users will find equivalent shortcuts using Command instead of CTRL in most cases.
Quick Reference — All 14 NVivo Shortcuts at a Glance
| Shortcut | What It Does |
| CTRL+A | Select all items in the current view |
| CTRL+X | Cut selected item(s) |
| CTRL+V | Paste cut or copied item(s) |
| CTRL+Z | Undo last action |
| CTRL+F2 | Code a selected passage |
| CTRL+SHIFT+O | Open/reveal the selected code |
| CTRL+F8 | Code in vivo (passage becomes the code name) |
| CTRL+SHIFT+F2 | Un-code a selected passage |
| CTRL+SHIFT+N | Create a new code |
| CTRL+SHIFT+P | View properties of a selected code |
| CTRL+SHIFT+A | Annotate a selected passage |
| CTRL+E | Toggle editing on/off for a transcript |
| CTRL+SHIFT+E | Export a chart or visualisation |
| CTRL+P | Print or export a coded document |
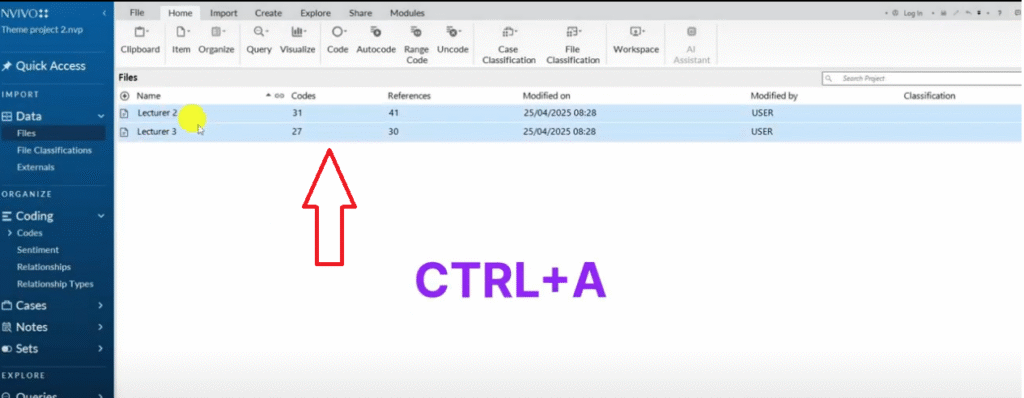
Shortcut 1 — CTRL+A: Select All

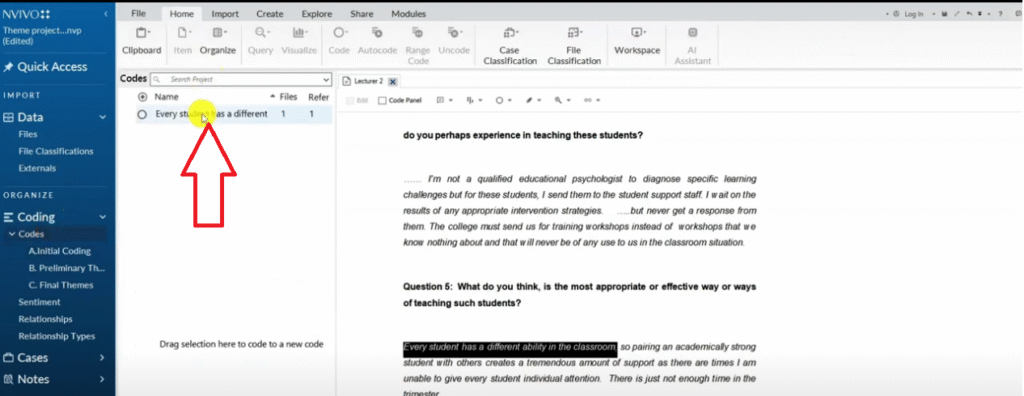
This is the most straightforward shortcut, but it saves a surprising amount of time once you start using it consistently. CTRL+A selects everything in the current section of NVivo — whether that’s all files in a folder, all codes in a theme, or all items in your code list.
Where it’s most useful: in the codes panel. Say you have final themes and you want to select Theme 1, Theme 2, Theme 3, and Theme 4 along with all their sub-codes. Just click on any single code and press CTRL+A. NVivo automatically selects the highest hierarchy level in the folder, so you get everything at once — no shift-clicking required.
Shortcut 2 — CTRL+X and CTRL+V: Cut and Paste
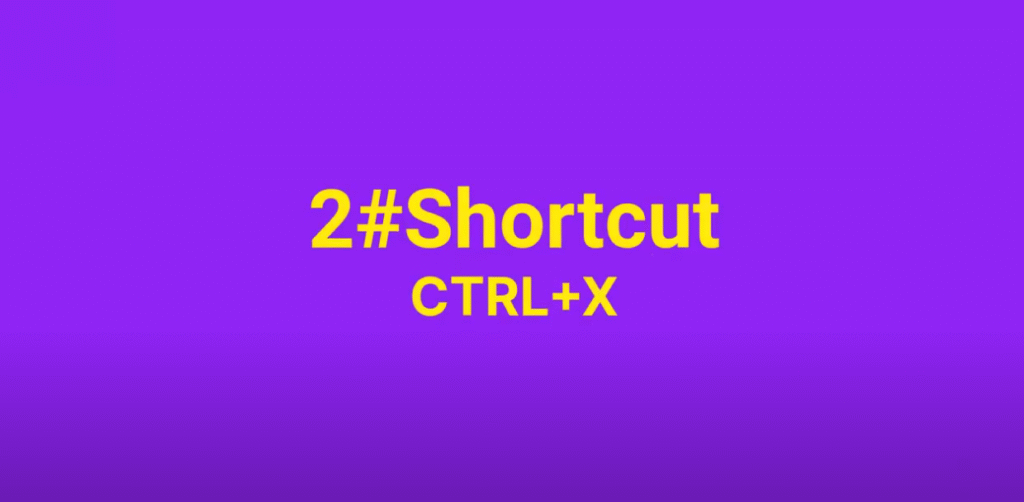
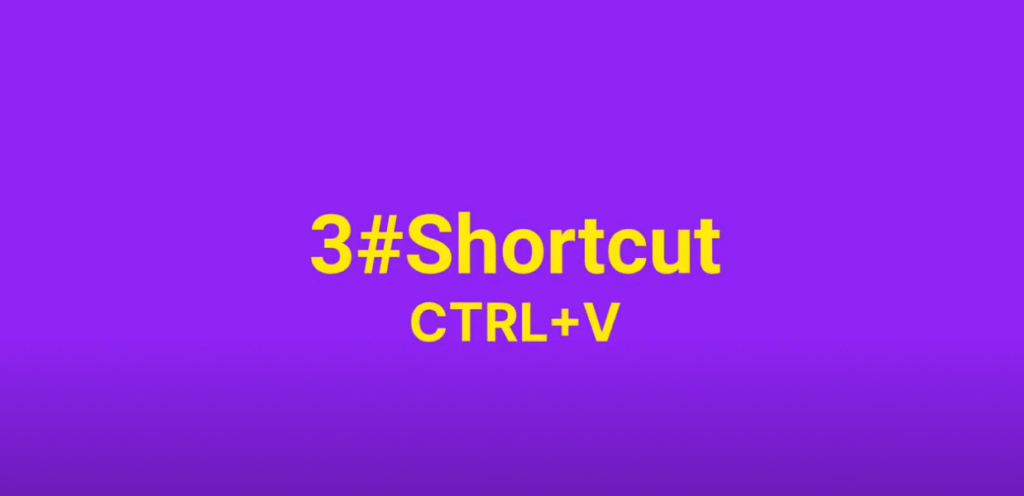
These two shortcuts work together and are essential for organising your codes. CTRL+X cuts the selected item, and CTRL+V pastes it wherever your cursor is. In NVivo, the most common use case is merging codes that overlap in meaning — cut one and paste it under another to create a hierarchy.
One thing to watch: when you paste a code under another, NVivo sometimes places it as a child node rather than merging it. If the result doesn’t look right, immediately use CTRL+Z to undo and try again. Getting comfortable with cut, paste, and undo as a trio will make your code re-organisation far more fluid.
Shortcut 3 — CTRL+Z: Undo
CTRL+Z is your safety net. In NVivo, coding mistakes are easy to make — a misplaced drag-and-drop can reorganise your entire code hierarchy in a way that takes minutes to untangle manually. CTRL+Z undoes the last action immediately, so you can correct mistakes without disrupting your flow.
This shortcut pairs naturally with the cut-and-paste workflow above. If you’re doing a lot of code reorganisation, it’s worth reading my article on common coding mistakes in qualitative data analysis to understand which errors are easiest to make — and therefore most important to catch early.
Shortcut 5— CTRL+F2: Code a Selection
This is the shortcut you’ll use most during active coding. CTRL+F2 opens the ‘Code Selection’ dialogue box, which lets you assign a highlighted passage to an existing code or create a new one — all without touching the mouse.
Here’s the workflow: open a transcript, highlight the passage you want to code, then press CTRL+F2. In the dialogue box, navigate to the appropriate theme folder, select or create a code, and confirm. The passage is coded instantly. For researchers working through long interview transcripts, this shortcut alone can save 30 minutes or more per coding session.
Shortcut 6— CTRL+SHIFT+O: Open and Reveal a Code
After coding a passage, you may want to immediately see all the content assigned to that code — to check whether the passage fits, or to review what’s already there. CTRL+SHIFT+O opens the selected code and reveals all the passages coded within it.
This shortcut works in combination with CTRL+F2. Code a passage, then press CTRL+SHIFT+O to instantly verify that your new passage sits correctly within the code alongside existing ones. It’s a fast quality-checking step that keeps your analysis tight.
Shortcut 7— CTRL+F8: Code In Vivo

In vivo coding is a technique where the participant’s exact words become the code name — rather than you interpreting and labelling the meaning. SAGE Research Methods describes in vivo coding as particularly valuable in grounded theory and when preserving participant voice is important to the study.
In NVivo, CTRL+F8 automates this entirely. Highlight any passage and press CTRL+F8 — NVivo creates a new code whose name is exactly the selected text and immediately assigns that passage to it. You can then move the code to the appropriate folder using drag-and-drop. Fast, precise, and preserves the participant’s exact language.
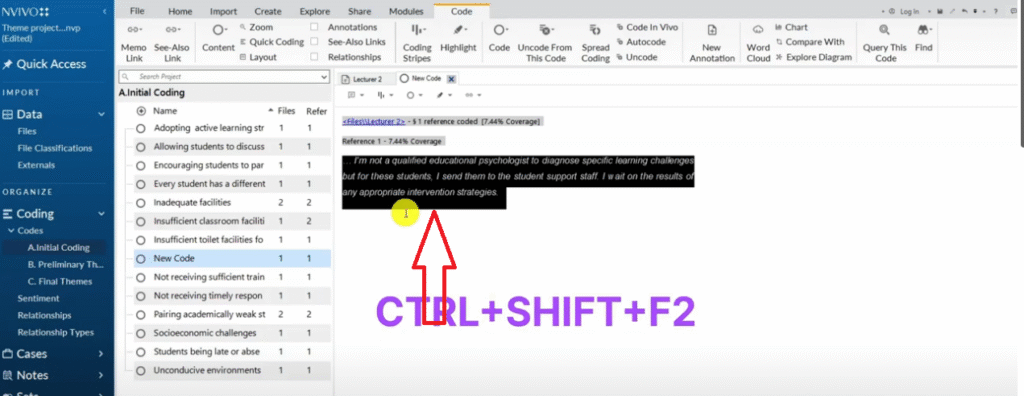
Shortcut 8 — CTRL+SHIFT+F2: Un-code a Selection
Sometimes you’ll code a passage and later decide it doesn’t belong in that code — maybe you’ve refined your coding framework, or realised the passage fits better elsewhere. CTRL+SHIFT+F2 removes the coding from a selected passage without deleting the code itself.
Highlight the passage, press CTRL+SHIFT+F2, and NVivo asks you which code to remove it from. Select the code and confirm. The passage is un-coded cleanly. This is much safer than trying to drag content out of a code node, which can accidentally move or merge things you didn’t intend to touch.
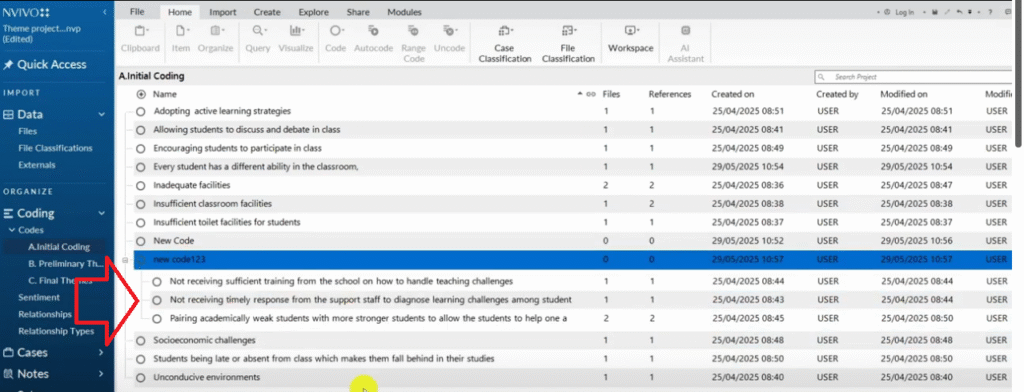
Shortcut 9 — CTRL+SHIFT+N: Create a New Code
During initial coding, you’ll regularly need to create new container codes — themes or categories that don’t yet exist in your code list. Rather than right-clicking and navigating menus, press CTRL+SHIFT+N while in the codes panel. NVivo immediately creates a new code ready for you to name.
These new codes are typically used as containers: you create the parent code, then drag and drop related sub-codes into it to build your hierarchy. Working this way — creating containers first, then organising codes underneath — is one of the fastest approaches to building a clean thematic structure in NVivo.
Shortcut 10 — CTRL+SHIFT+P: View Code Properties
Every code in NVivo has a properties panel where you can read and edit its description. This is where you document what the code means — essential when you’re working on a long project and need to stay consistent, or when you’re collaborating with another researcher.
Select any code and press CTRL+SHIFT+P to open its properties instantly. Add or review the description without navigating away from your current view. Keeping code descriptions up to date as you work is a good practice for rigour — it also makes writing up your findings chapter much easier later.

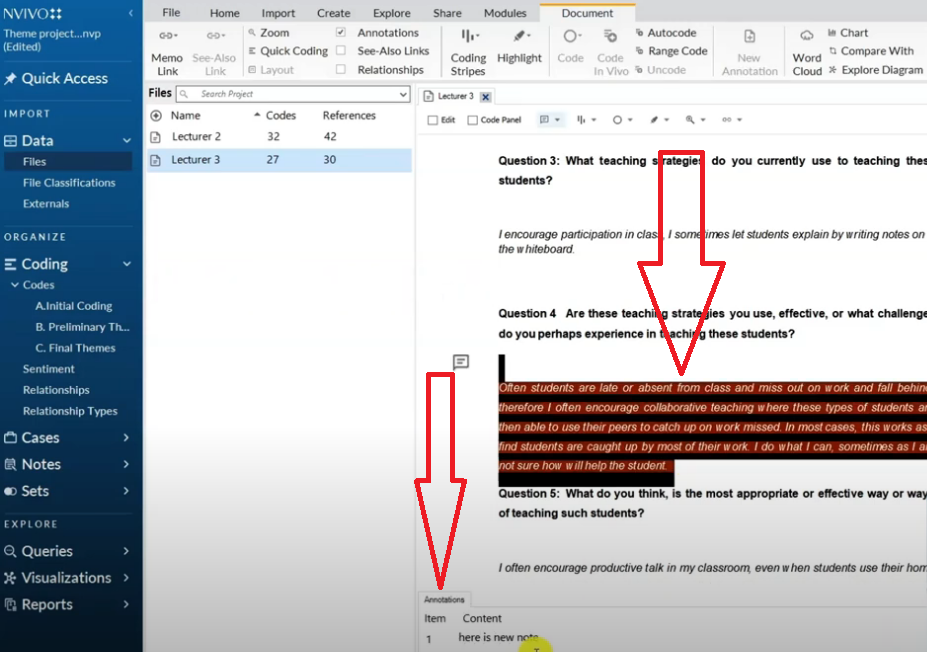
Shortcut 11 — CTRL+SHIFT+A: Annotate
Annotations in NVivo are notes you attach to a specific passage in a transcript — not codes, but memo-style observations about what you’re seeing in the data as you code. They’re useful for capturing ideas mid-session: ‘This could connect to Theme 3,’ or ‘Check whether other participants said something similar.’
Highlight any passage in a transcript, press CTRL+SHIFT+A, and type your note. The annotation is saved and visually marked in the transcript. This keeps your analytical thinking attached to the relevant data rather than scattered in a separate document — and it’s much faster than switching windows to write a memo.
Shortcut 12 — CTRL+E: Edit a Transcript

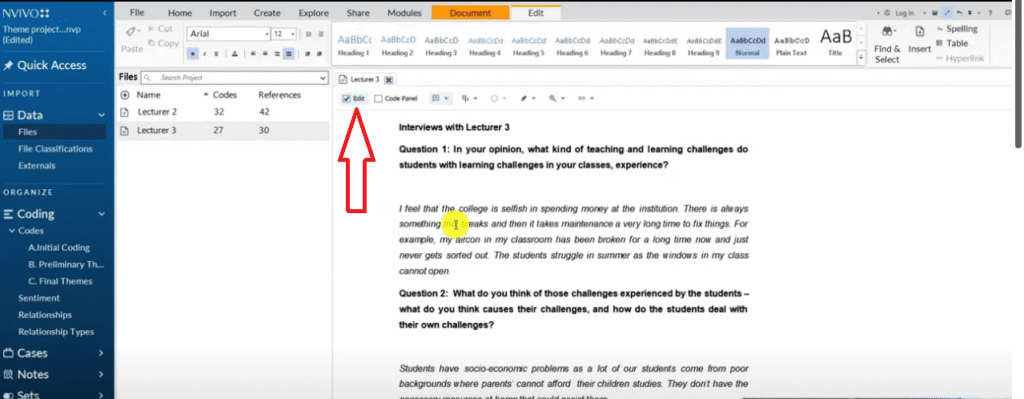
Imported transcripts are read-only by default in NVivo — you can code them but not change the text. If you notice a transcription error that you don’t want captured in your codes (a misheard word, a formatting artefact, a speaker label that’s wrong), press CTRL+E to activate editing mode.
While editing is on, you can delete or correct text just as you would in a word processor. Press CTRL+E again to turn editing off and return to coding mode. Use this carefully — once you edit a transcript in NVivo, those changes don’t sync back to your original file.
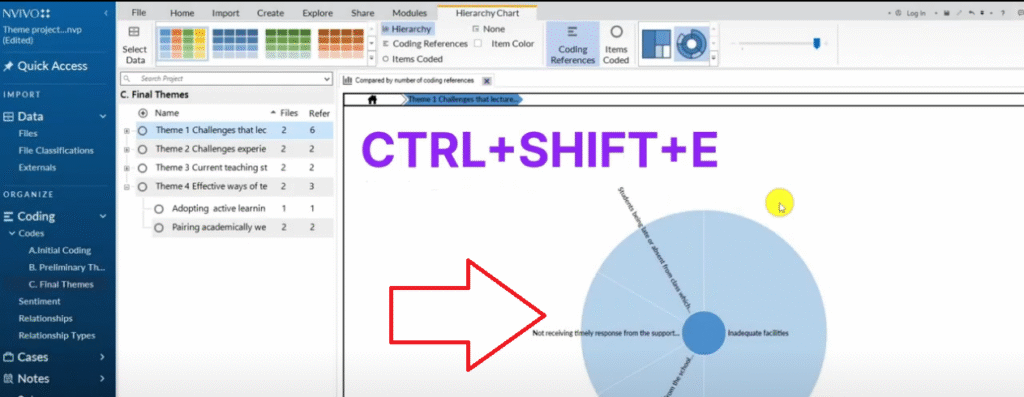
Shortcut 13 — CTRL+SHIFT+E: Export a Visualisation
Once you’ve run a visualisation — a hierarchy chart, word cloud, or comparison diagram — you’ll want to export it for your findings chapter or presentation. CTRL+SHIFT+E opens the export dialogue instantly, without you needing to hunt through the Share or Export menus.
NVivo lets you export visualisations as images or PDFs. This shortcut is particularly useful during the write-up phase when you’re pulling visuals together quickly. Pair it with CTRL+SHIFT+A annotations to make sure you’ve noted what each visual represents before exporting.
Shortcut 14 — CTRL+P: Print and Export a Coded Document
This is the shortcut for exporting a coded transcript — one of the most useful outputs for demonstrating rigour in your dissertation. First, turn on coding stripes in your transcript view (this shows coloured bars alongside each coded passage indicating which codes are applied). Then press CTRL+P.
NVivo opens a print dialogue that lets you save the annotated transcript as a PDF. The exported document shows your transcript with all coding stripes visible — a clear audit trail of your analysis that you can include in your appendix or share with a peer debriefer for external review.
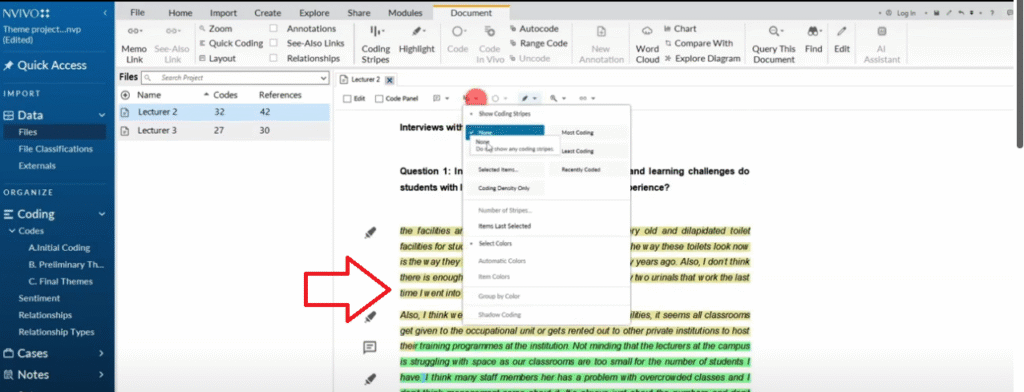
You can see on my right here I have a lot of information and I want to export this document to show that I coded.

If you want to understand how this coded document fits into a full thematic analysis workflow, my article on qualitative coding of interviews with NVivo walks through the complete process from raw transcripts to coded themes.
Frequently Asked Questions
Do these NVivo shortcuts work on Mac?
Most of these shortcuts use CTRL on Windows. On a Mac, substitute Command (Cmd) for CTRL in most cases — so CTRL+F2 becomes Cmd+F2. A small number of shortcuts may differ or be unavailable on Mac, so check NVivo’s official help documentation for your specific version if a shortcut doesn’t respond.
Which NVivo shortcuts should I learn first?
Start with the four you’ll use on every coding session: CTRL+F2 (code a selection), CTRL+Z (undo), CTRL+SHIFT+N (create a new code), and CTRL+A (select all). Once those feel automatic, add CTRL+F8 for in vivo coding and CTRL+SHIFT+F2 for un-coding.
Can I customise NVivo keyboard shortcuts?
NVivo does not currently allow users to remap or customise keyboard shortcuts. The 14 shortcuts in this article are the built-in set. If you need a specific action to be faster and there’s no shortcut for it, the best workaround is to use the Quick Access Toolbar to pin frequently used commands.
Are these shortcuts the same across NVivo versions?
The core shortcuts covered here have been consistent across recent NVivo versions (NVivo 12, 14, and 15). For a complete and version-specific list, always check Lumivero’s official NVivo support pages
Key Takeaways
If you’re working through your coding and need hands-on support, I offer one-on-one consulting sessions for PhD students. I’ve helped over 200 researchers complete their thematic analysis using NVivo, MAXQDA, and ATLAS.ti — reach out and let’s talk.