Last Updated on 1 month ago by Bernard Mugo
In this guide, I’m going to show you exactly how to conduct reflexive thematic analysis in NVivo, following the six steps proposed by Braun and Clarke. We go from raw interview transcripts all the way to a complete findings report. I’ll use NVivo 15 throughout, but the steps work equally well in earlier versions.
- What Is Reflexive Thematic Analysis? (Braun and Clarke Explained)
- Why Reflexivity Matters — and What a Reflexive Journal Looks Like
- Step 1 – Familiarize Yourself with the Data
- Step 2 – Generate Initial Codes in NVivo
- Step 3 – Generate Preliminary Themes
- Steps 4 and 5 – Review, Define, and Name Your Themes
- Step 6 – Produce the Findings Report
- Frequently Asked Questions
- Key Takeaways
- Need Help with Your Qualitative Analysis?
What Is Reflexive Thematic Analysis? (Braun and Clarke Explained)
Reflexive thematic analysis is a qualitative research method developed by Braun and Clarke for identifying, analysing, and reporting patterns — called themes — within qualitative data. What makes it distinct from other thematic approaches is the emphasis on reflexivity: the researcher’s active awareness of how their own background, experiences, and biases shape their interpretation of the data.
Braun and Clarke formalised this in their 2022 book Thematic Analysis: A Practical Guide, building on their widely cited 2006 paper in Qualitative Research in Psychology. The six-step framework they outline is:
- Familiarizing with the data
- Generating initial codes
- Generating themes
- Reviewing themes
- Defining and naming themes
- Producing the report

My name is Bernard Mugo. Over the past three years, I’ve helped more than 200 PhD students analyze qualitative data and complete their dissertations. The process I walk through here is exactly what I use with my own consulting clients.

Why Reflexivity Matters — and What a Reflexive Journal Looks Like
The word reflexive is a key addition to what used to be called simply the “Braun and Clarke six steps.” It signals something important: in this approach, you — the researcher — are not a neutral observer. Your experiences, background, and perceptions inevitably shape how you interpret what participants say.
Reflexive thematic analysis asks you to stay aware of this throughout your analysis by keeping a reflexive journal — a running record of your thoughts, feelings, and evolving interpretations as you code and develop themes. You incorporate these reflections into your thesis or dissertation in the role of the researcher section.
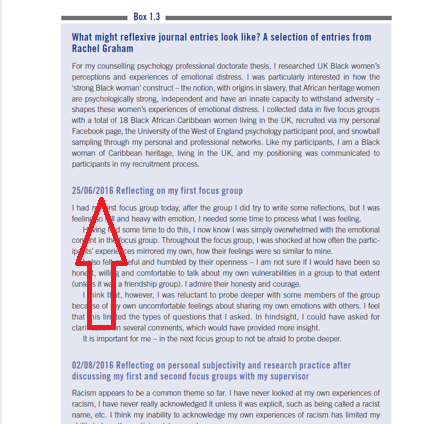
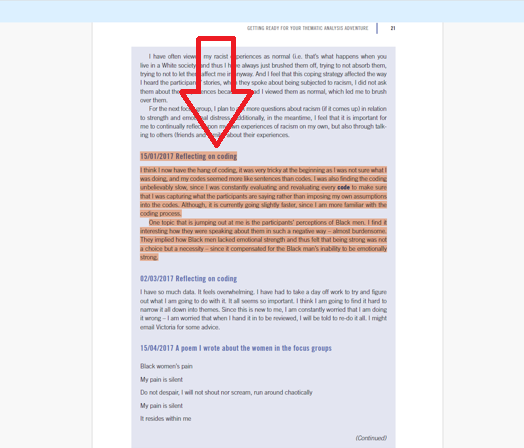
Examples of Reflexive Journal Entries
Here are two real examples from Braun and Clarke’s book.
The first researcher wrote after their first focus group: they describe feeling overwhelmed by the emotional weight of participants’ stories, recognising how their own discomfort may have limited the depth of their probing. They committed to going deeper in the next session.
The second entry, dated January 2017, describes a researcher mid-coding who noticed a pattern emerging around participants’ perceptions of Black men — and flagged their own awareness of how prior assumptions could influence interpretation.
These entries show what reflexive journals look like in practice: honest, dated, and specific. You don’t need perfect prose — just genuine reflection.
Step 1 – Familiarize Yourself with the Data
In this first step of reflexive thematic analysis, you read through all your transcripts as if reading a story. Don’t code yet — just read and take short notes on what stands out.
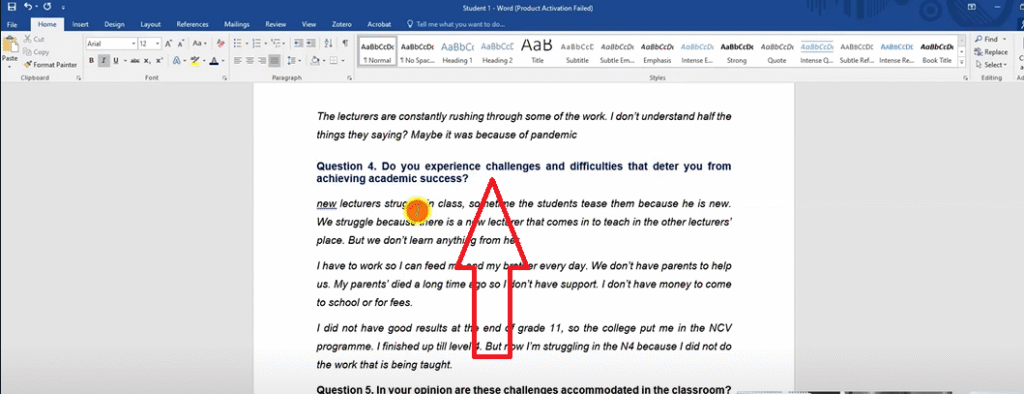
For this example, I’m analysing two transcripts from a study on student views of teaching strategies at a college. I read each transcript from start to finish and note emerging impressions: what are students concerned about? What surprises me? What patterns seem to be appearing?
This step is foundational. You can’t code well what you haven’t understood. Scribbr’s guide to thematic analysis has an excellent explanation of why data familiarization is not a step to rush, especially for dissertation research.

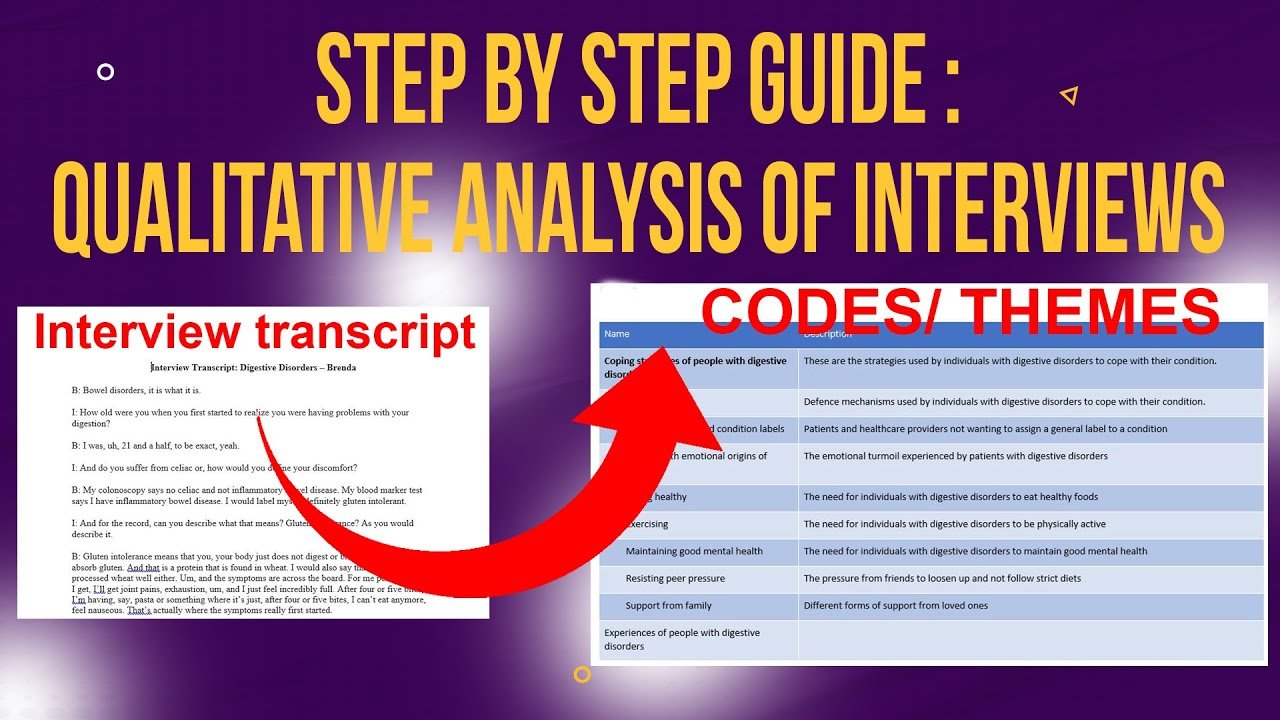
Step 2 – Generate Initial Codes in NVivo
Generating initial codes is where the real analysis begins. A code is a label — an interpretive statement — applied to any piece of data that’s meaningful to your research question. Codes don’t have to be one or two words; they just need to be concise and capture meaning accurately.

For a deeper overview of how qualitative coding works in practice, NVivo’s official resource hub at Lumivero is a useful reference point.
Setting Up Your NVivo Project
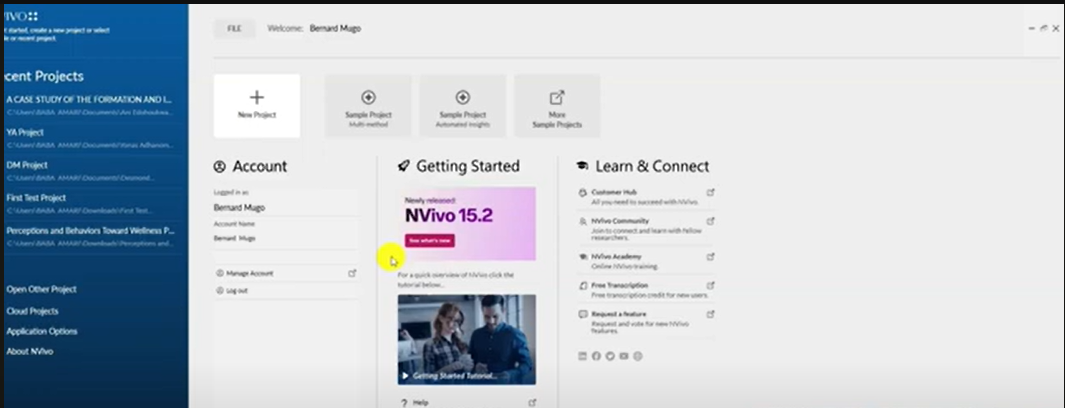
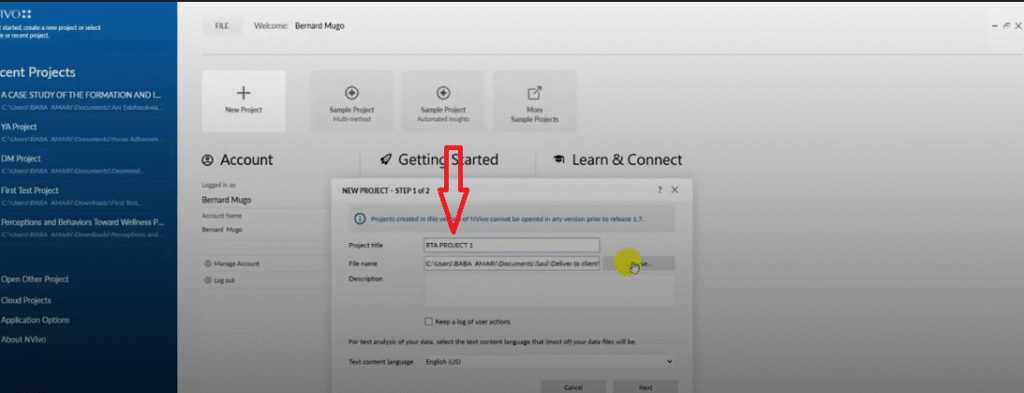
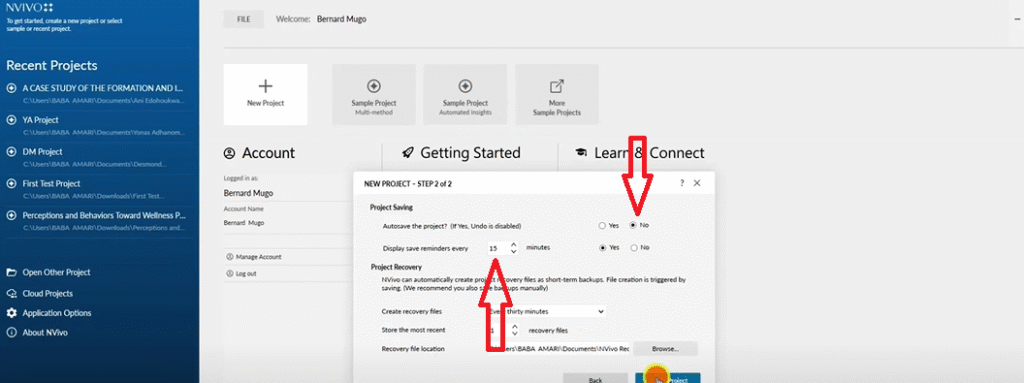
Open NVivo 15 and click New Project. Give your project a name — I’m calling mine RTA Project One — then choose your save location. When prompted about autosave, set it to remind you every 15 minutes and click Yes. This is your insurance policy against losing hours of work if NVivo crashes.
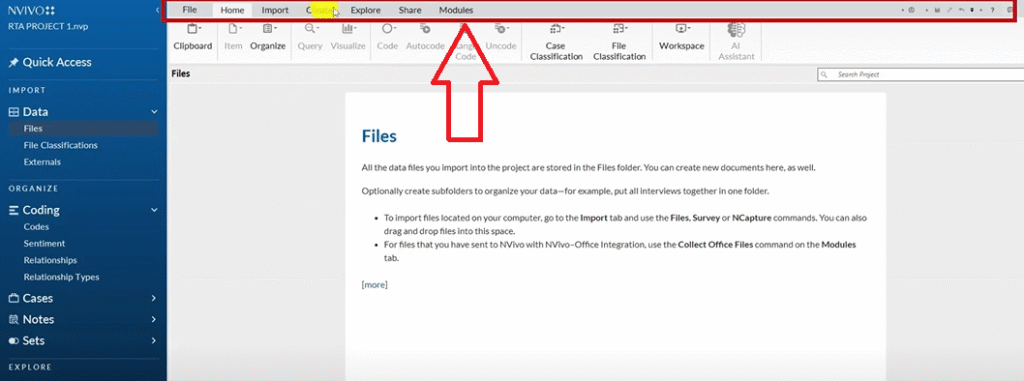
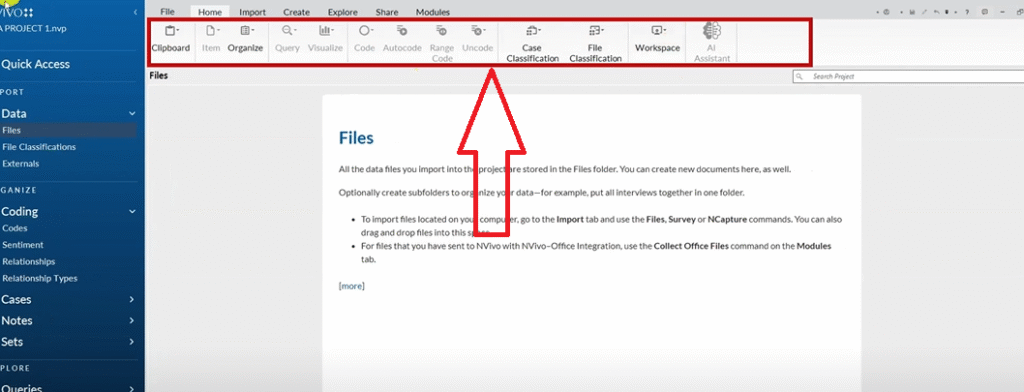
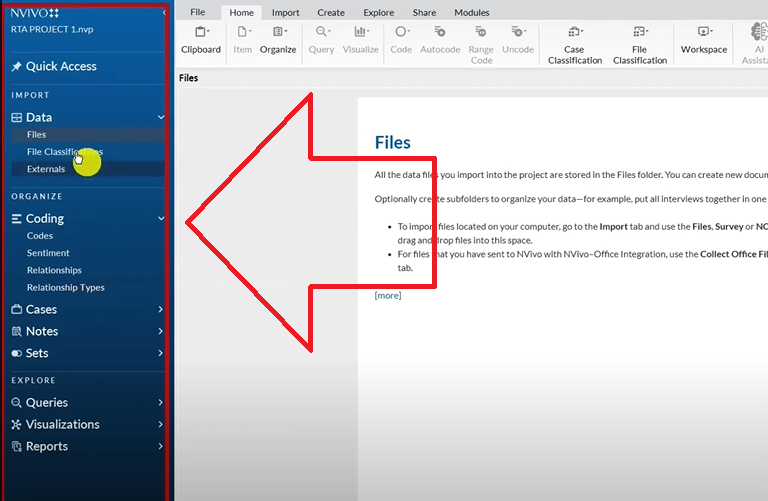
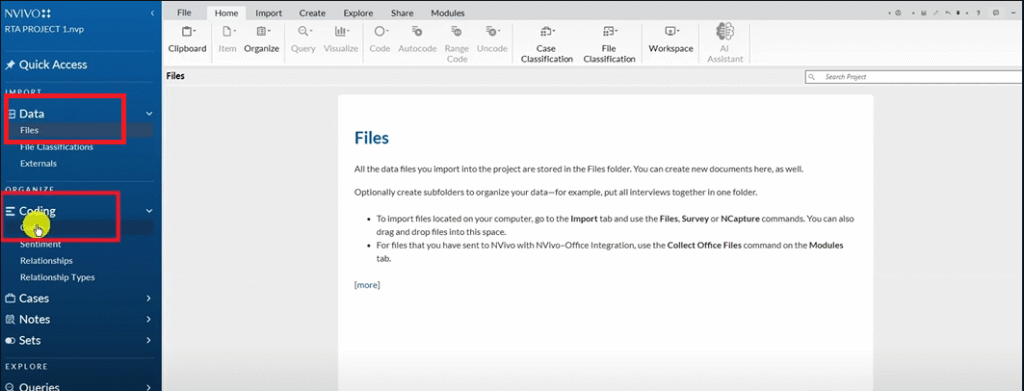
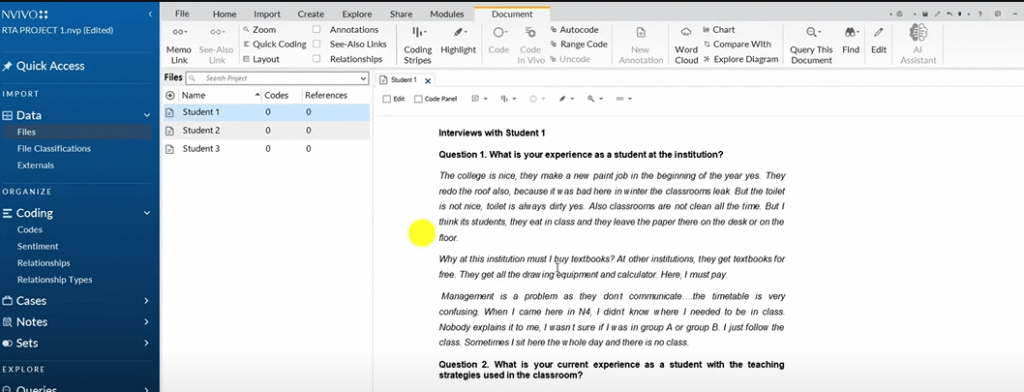
Once the project opens, focus on two sections in the left panel: Files (where your transcripts live) and Codes (where your analysis happens).
Importing Transcripts into NVivo
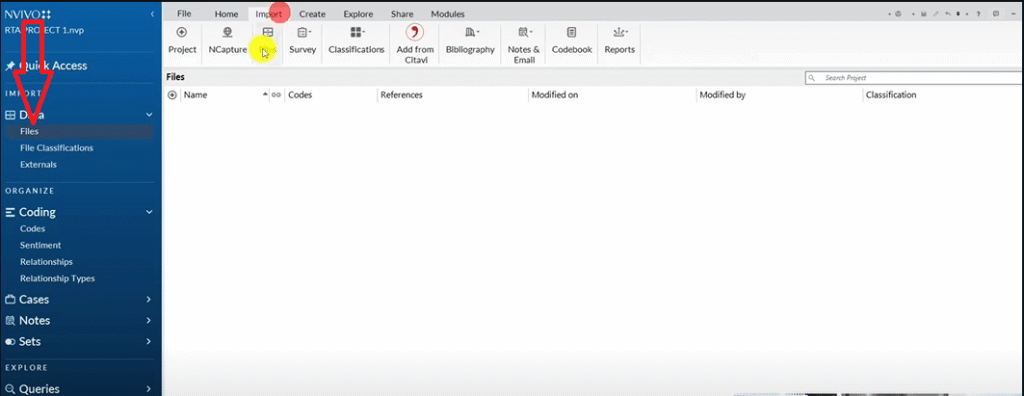
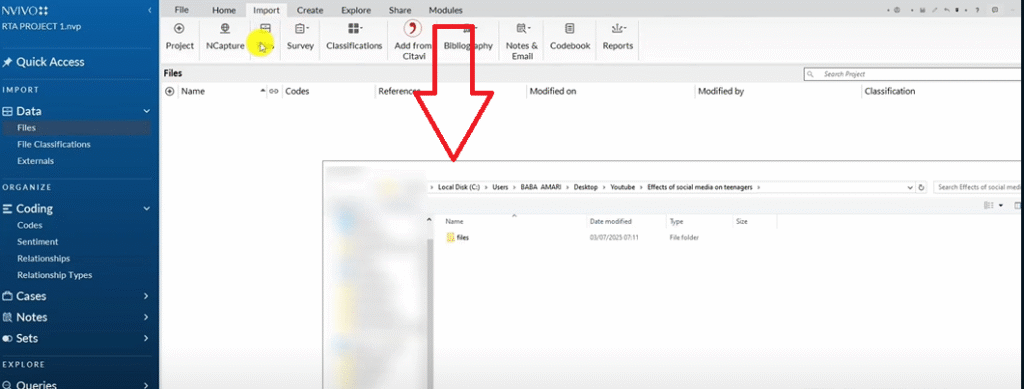
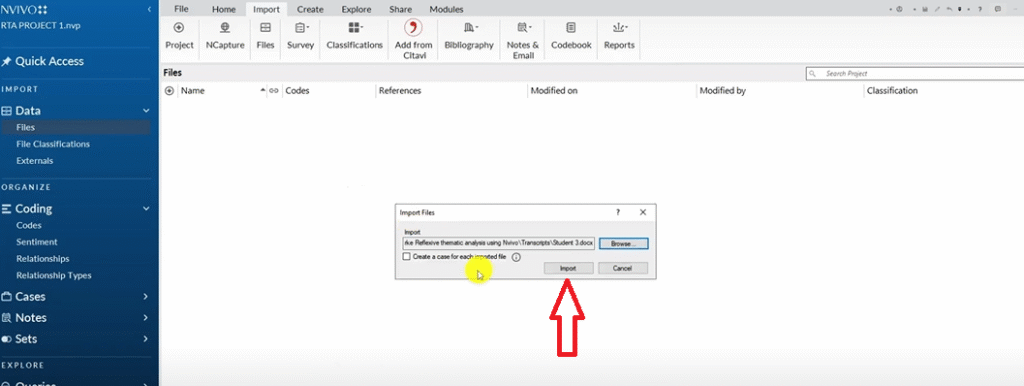
Click on the Files section in the left panel, then go to Import → Files. Select your transcript files and click Open. Alternatively, you can drag and drop transcripts directly into the Files section. Double-click any file to open it in the workspace.
How to Code: Color Codes vs. Questions as Containers
Before coding, you need a system for tracking where each code came from. I use two approaches:
Approach 1 — Color codes: Assign a color to each interview question (e.g. Question 1 = red, Question 2 = green). When you create a code, assign the matching color.
Approach 2 — Questions as containers: Create a folder for each question inside your Codes panel, then file codes inside the relevant folder. This is my preferred method — it keeps the structure clean and makes combining codes into themes easier.
Coding Walkthrough — Student Experience Study
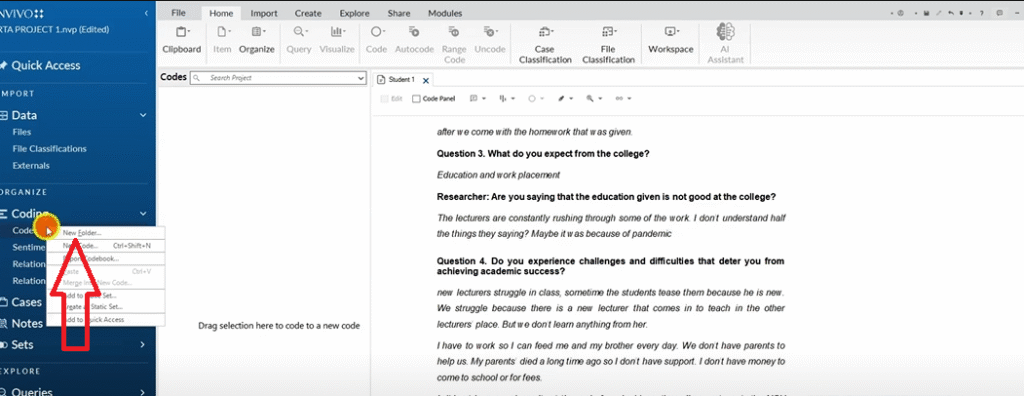
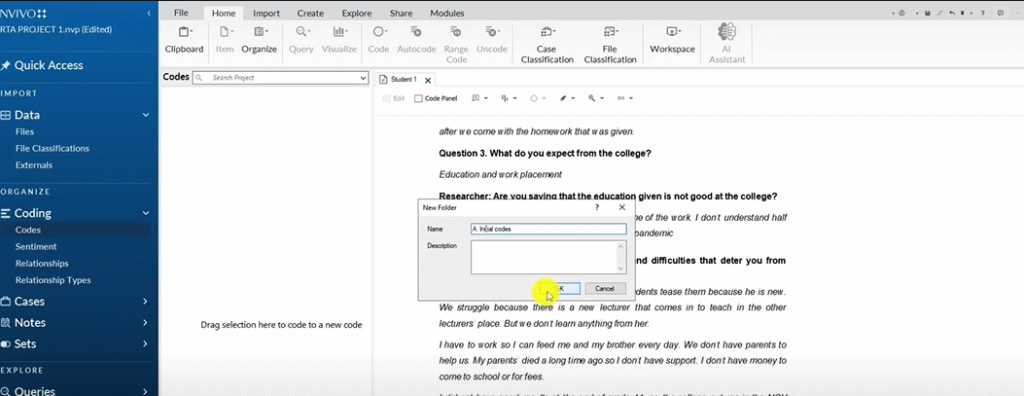
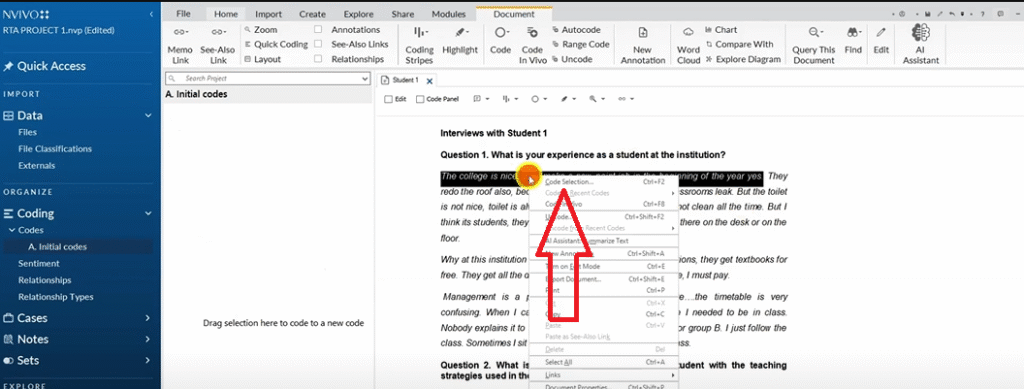
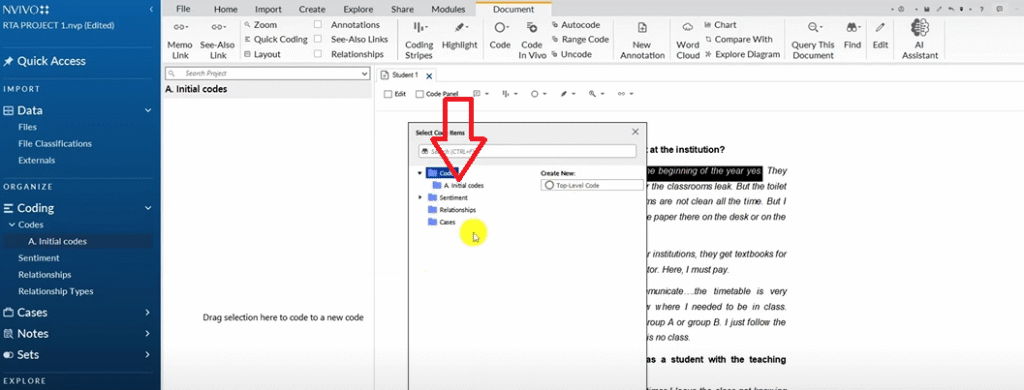
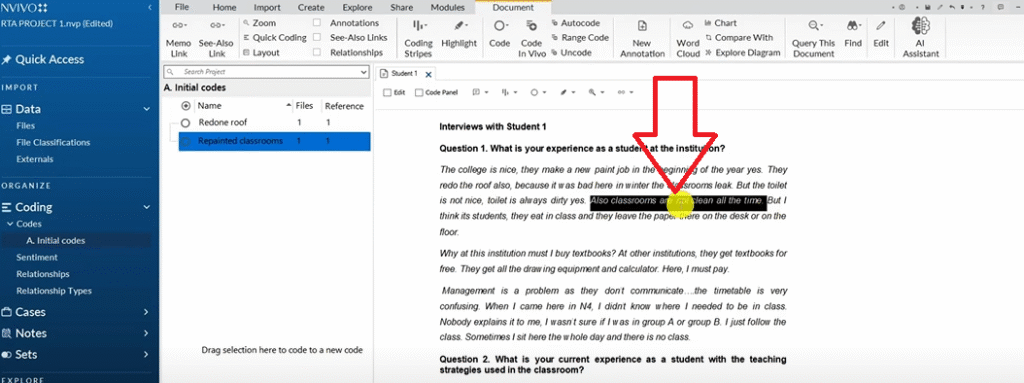
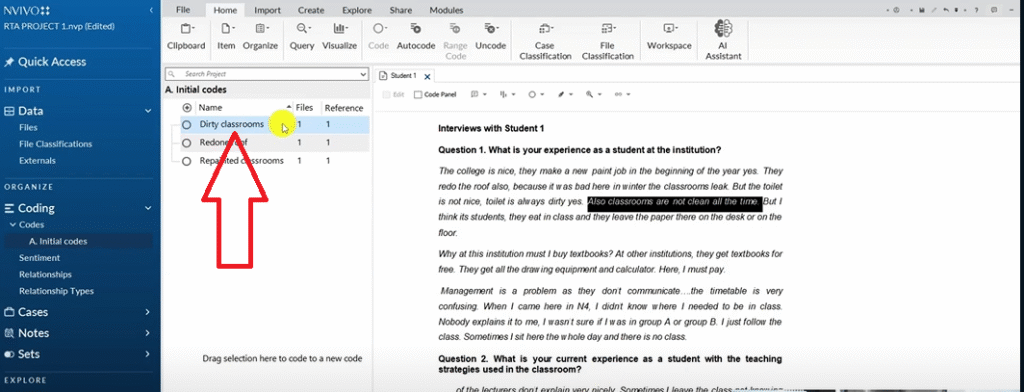
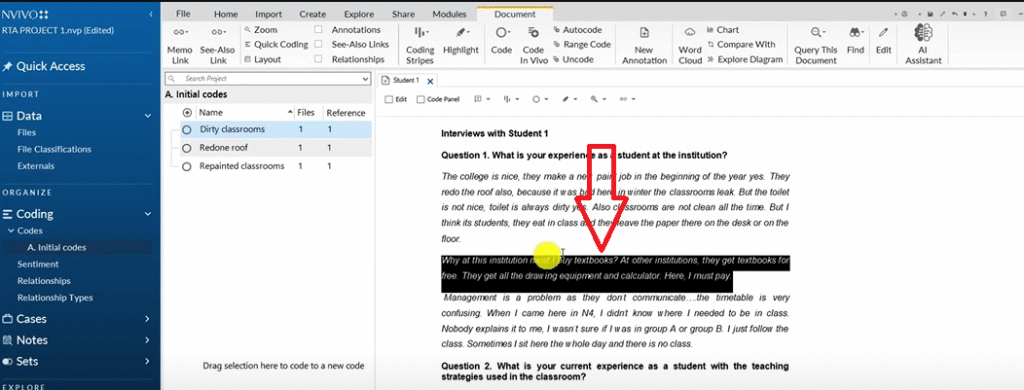
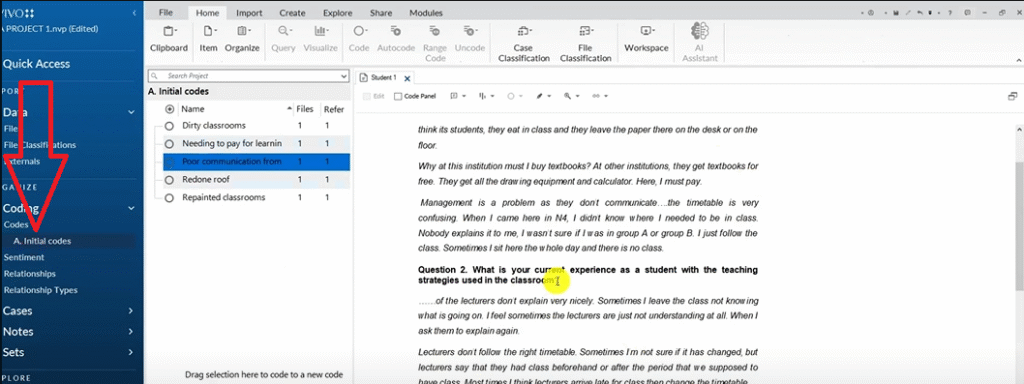
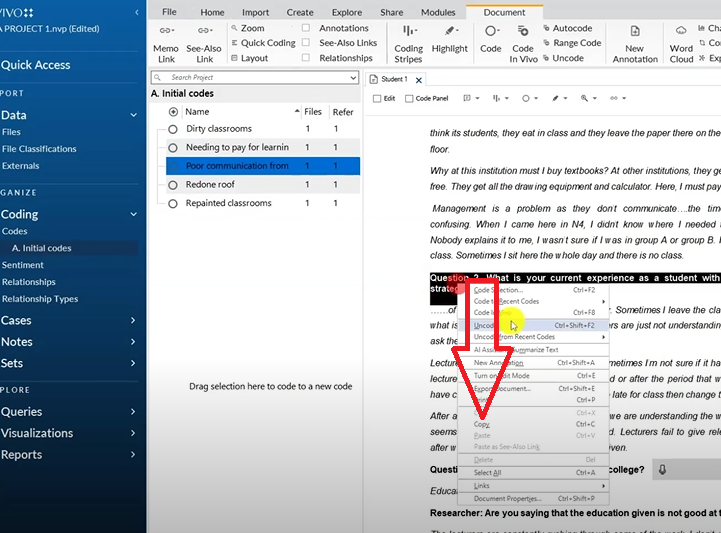
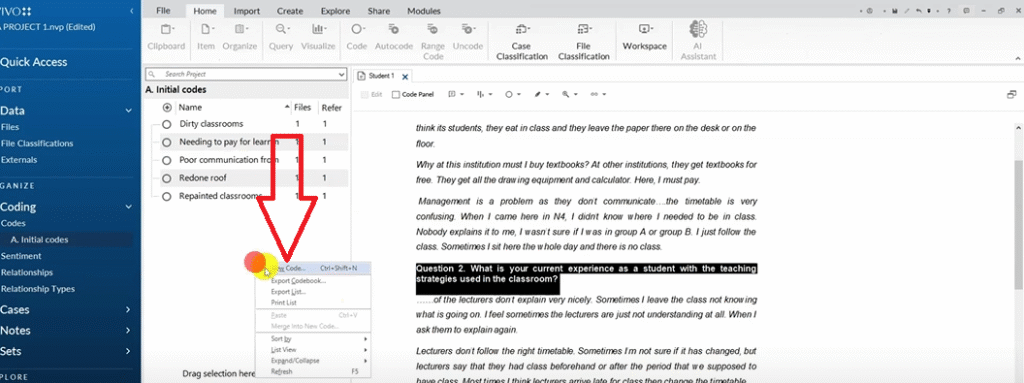
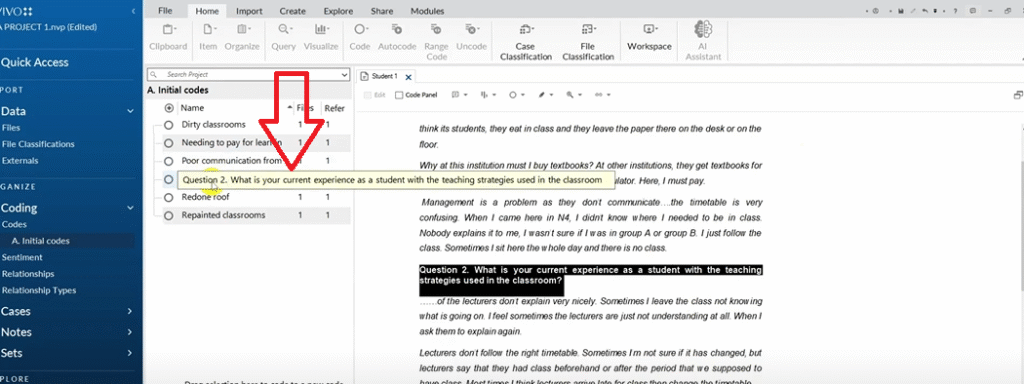
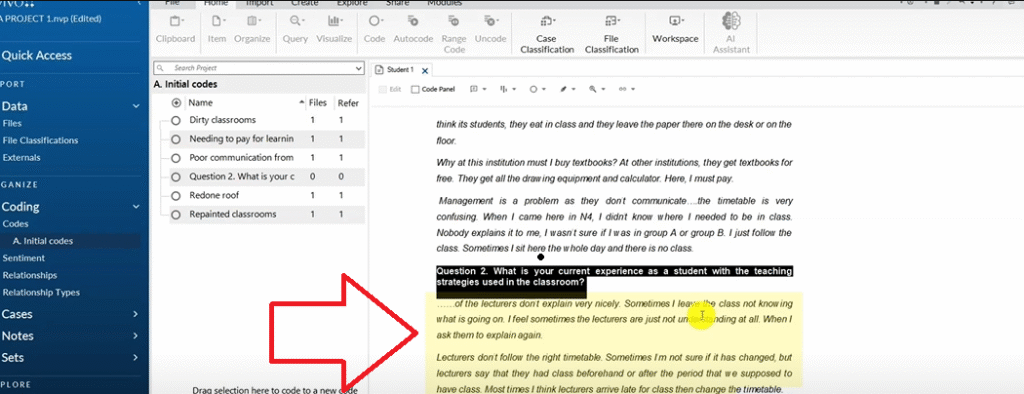
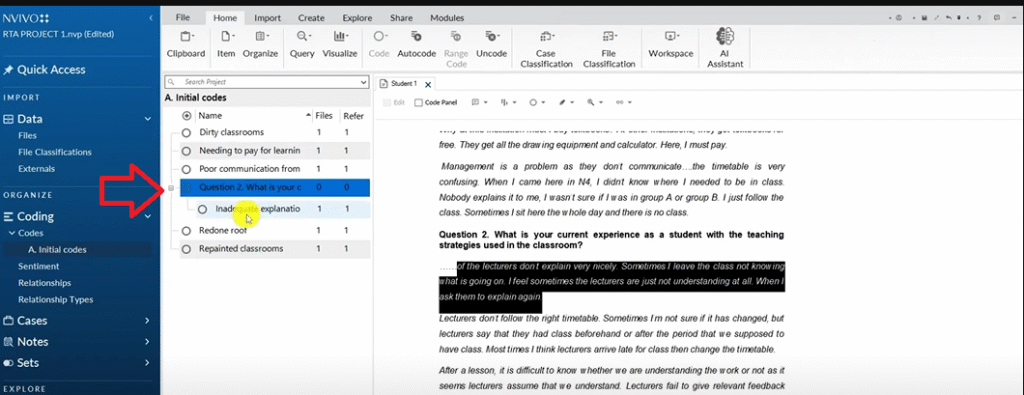
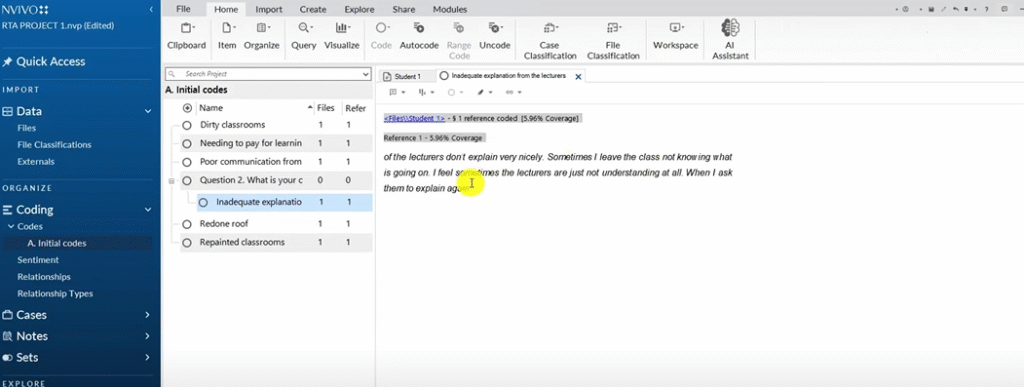
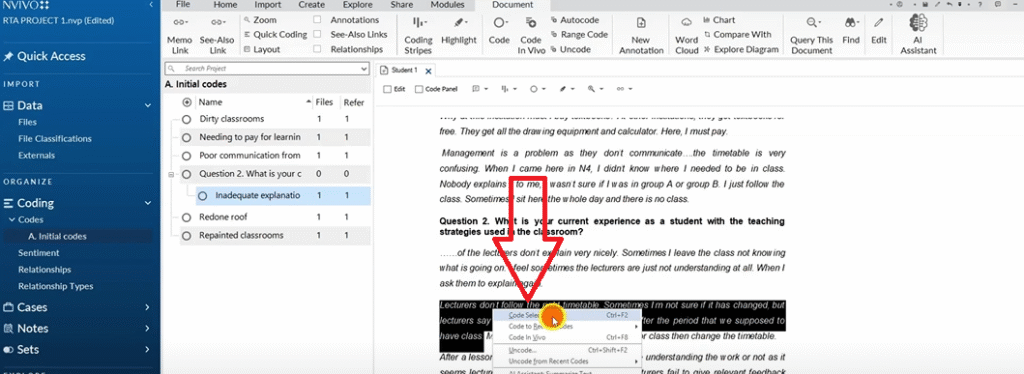
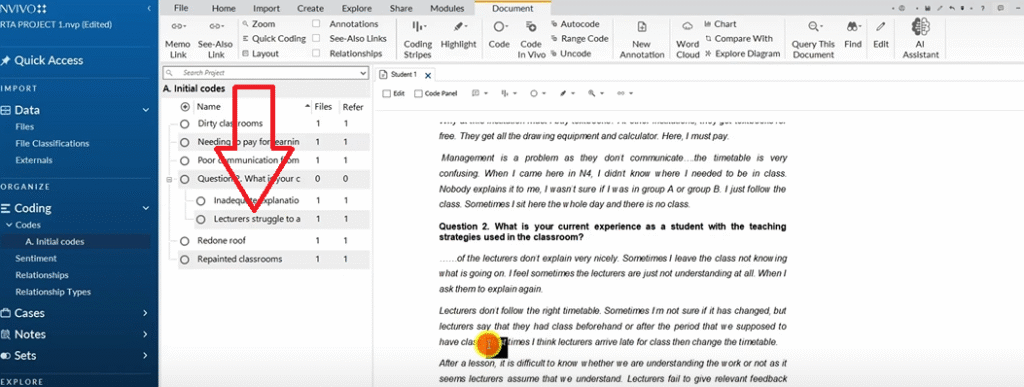
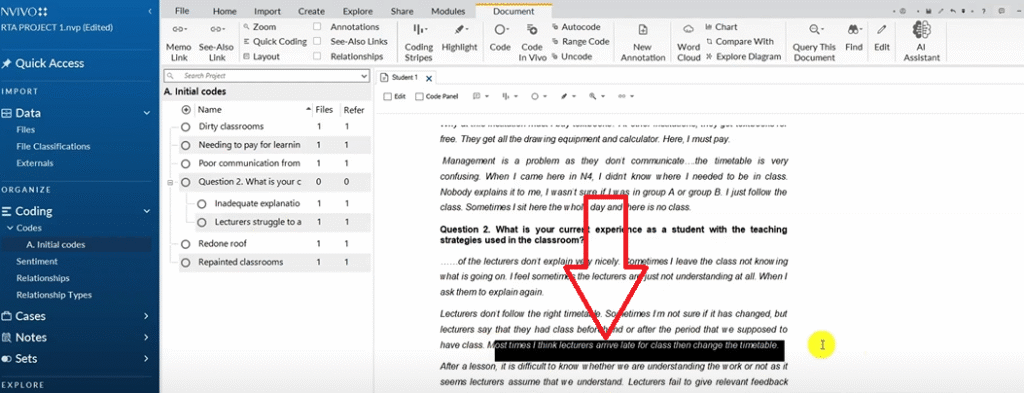
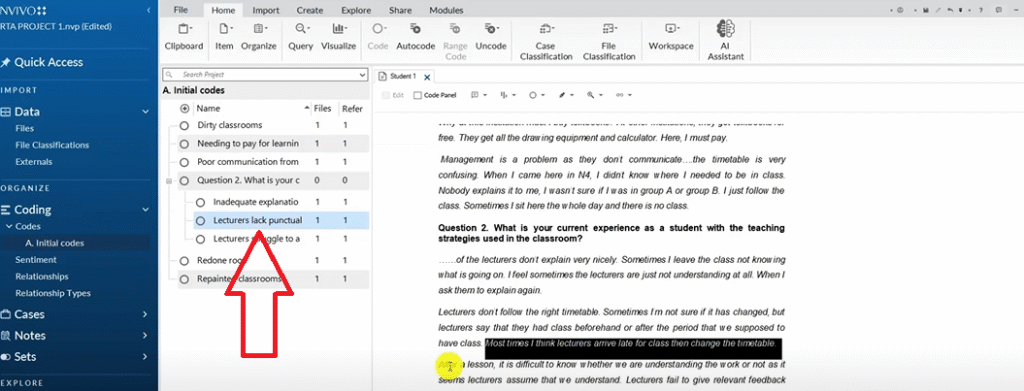
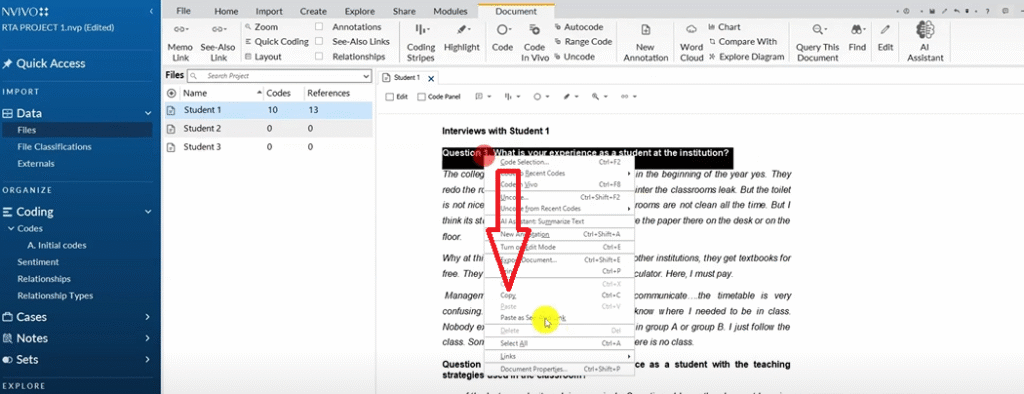
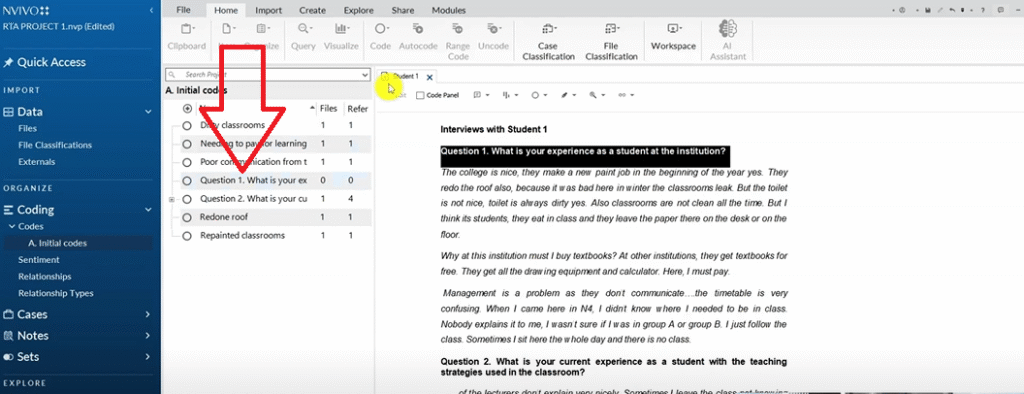
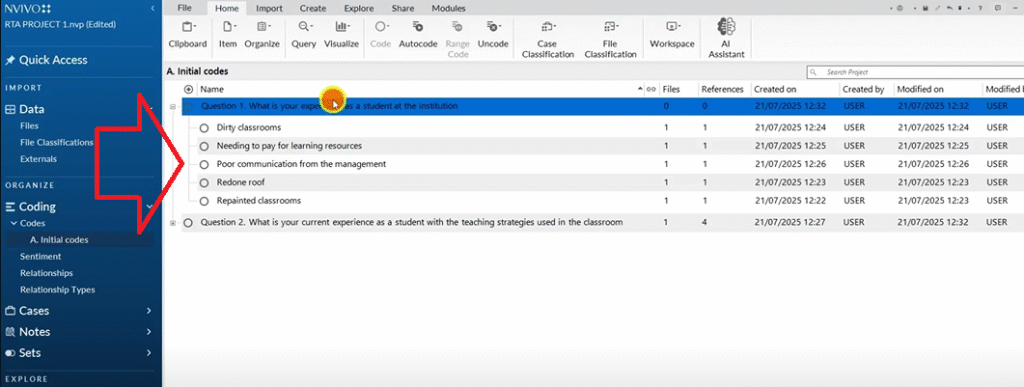
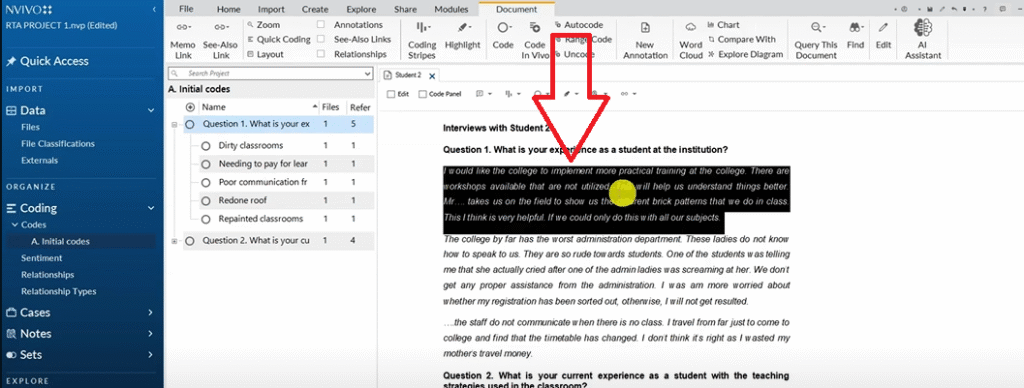
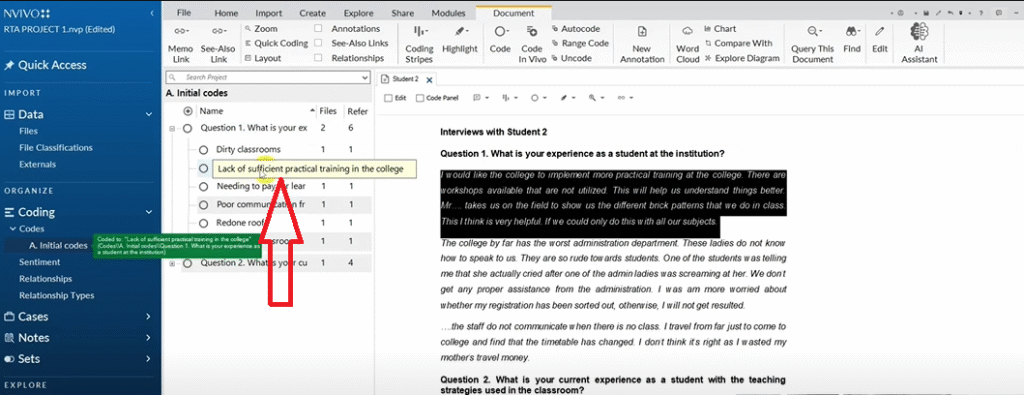
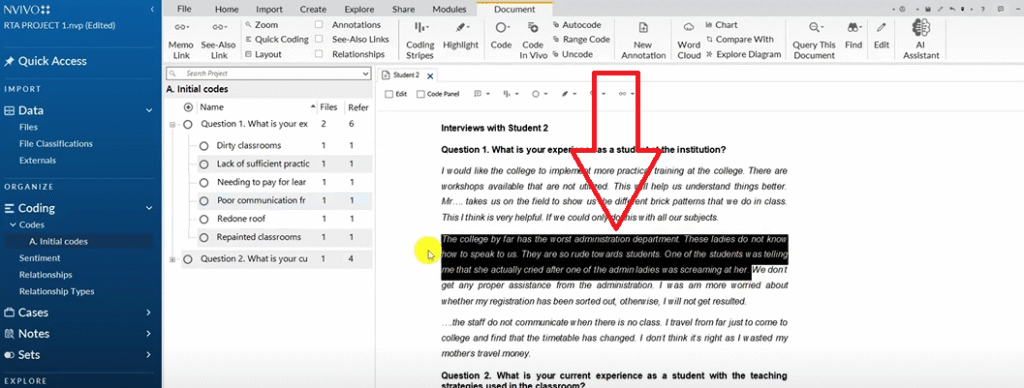
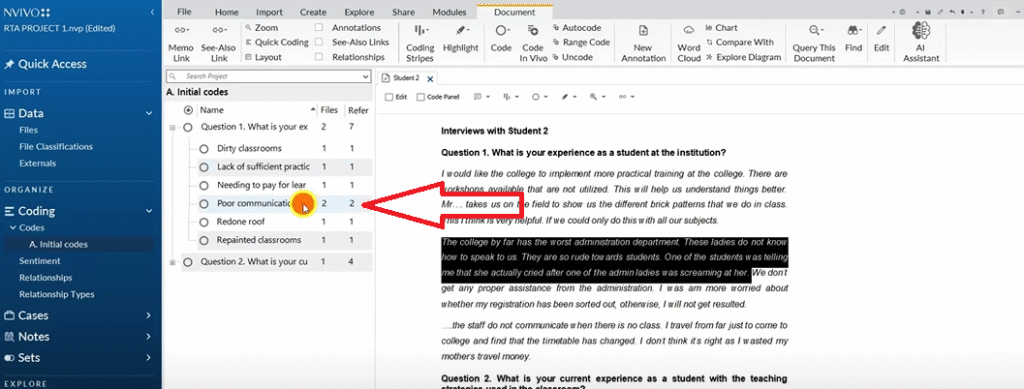
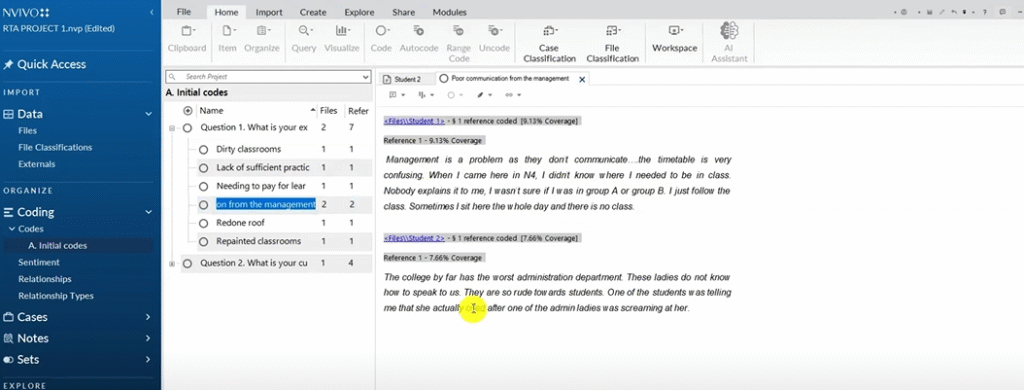
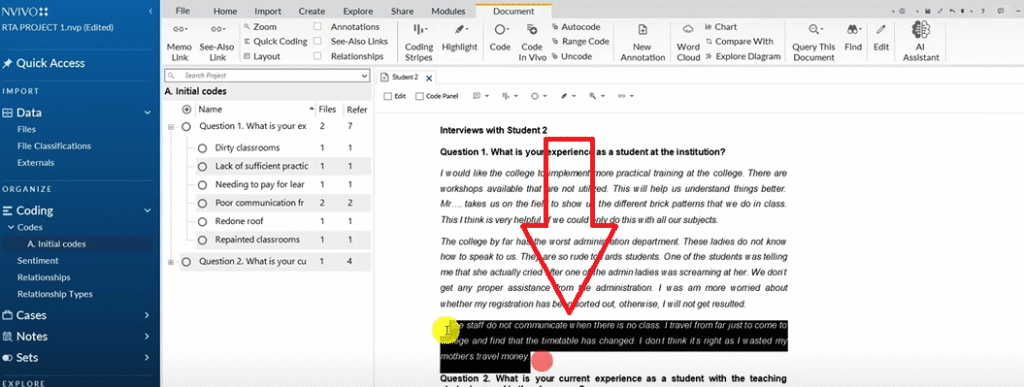
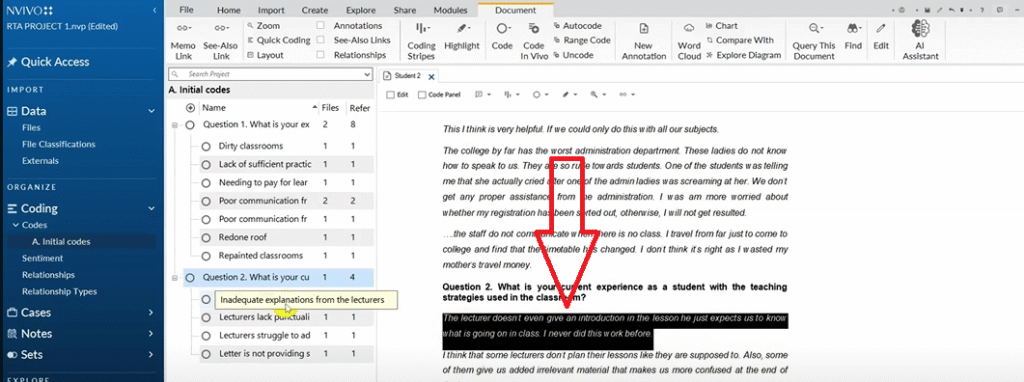
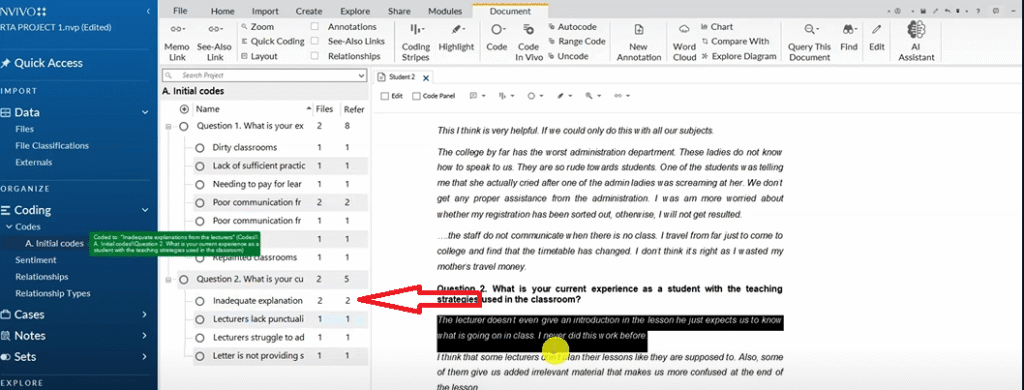
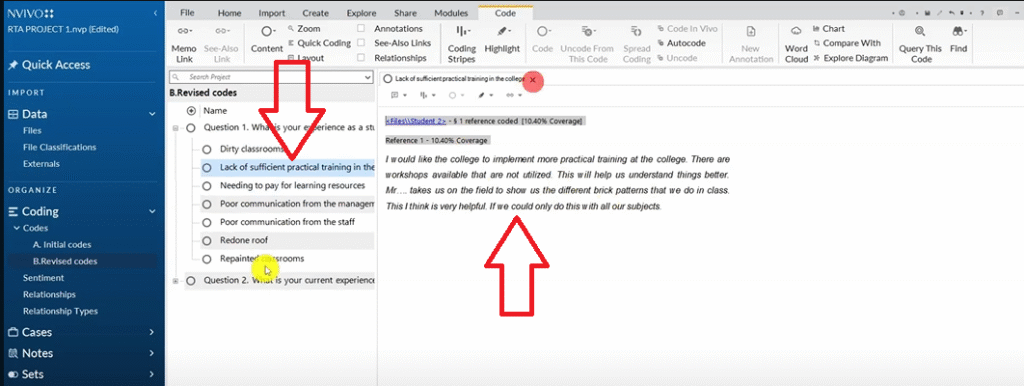
In the Codes panel, right-click and create a new folder. Name it Initial Codes. Open your first transcript and read the full response to Question 1 before coding anything. Then go back and highlight meaningful sections.
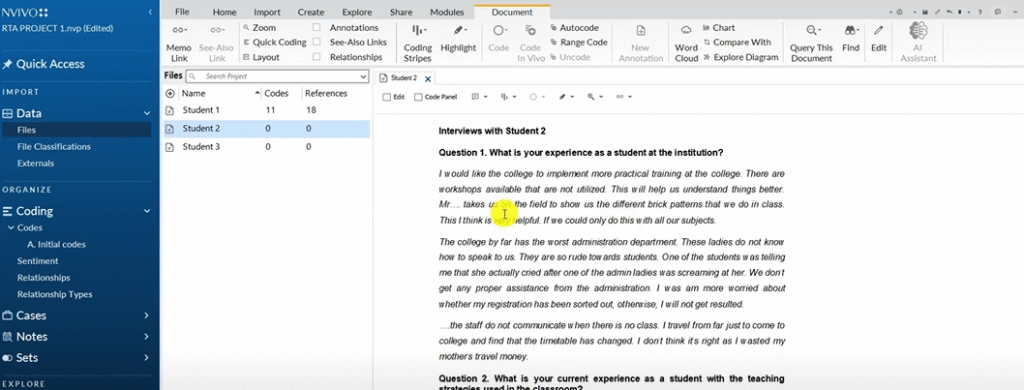
Here’s how it works in practice with Student 1’s response about their institution experience:
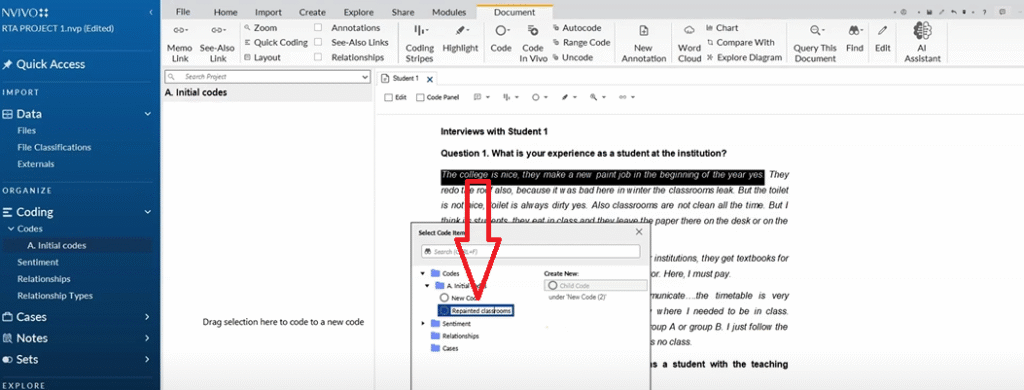
- Highlight “they repaint” → right-click → Code Selection → Initial Codes → new code: Repainted classrooms
- Highlight “redid the roof” → new code: Redone roof
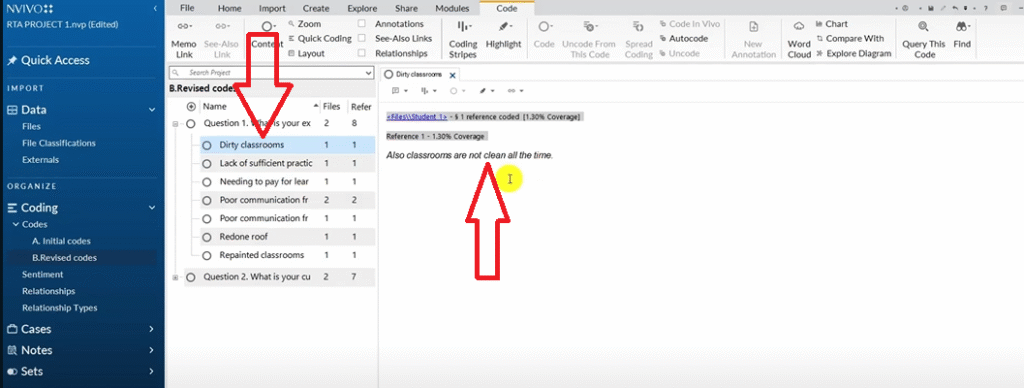
- Highlight “classrooms not clean” → new code: Dirty classrooms

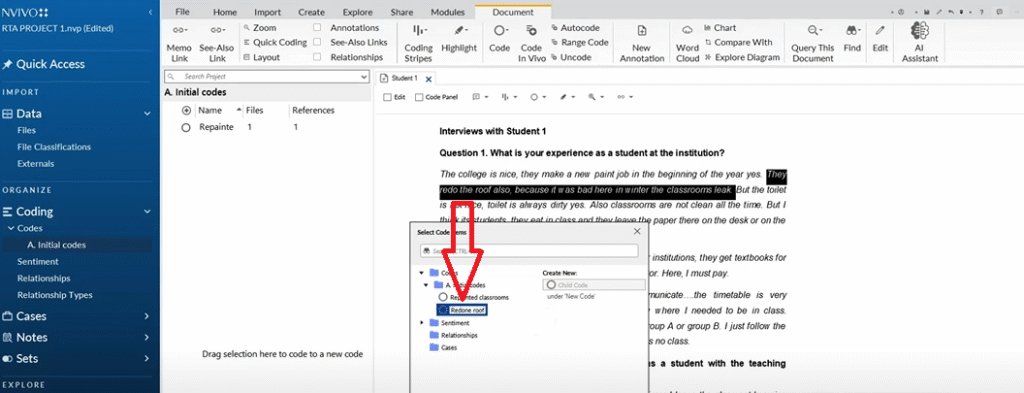
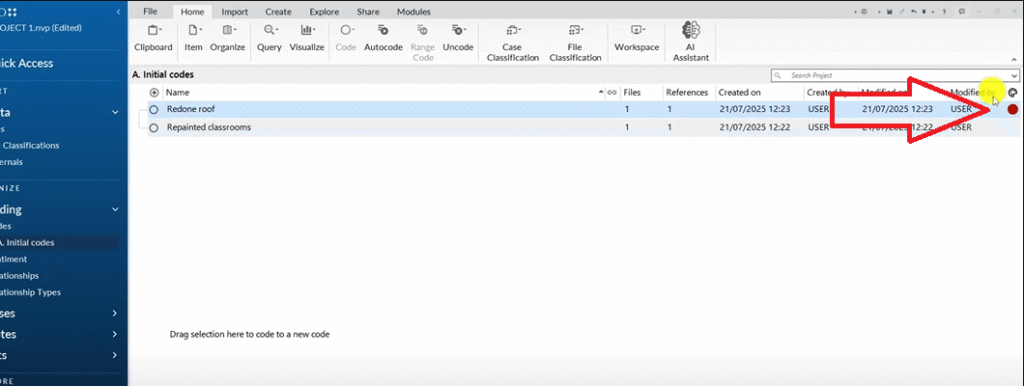
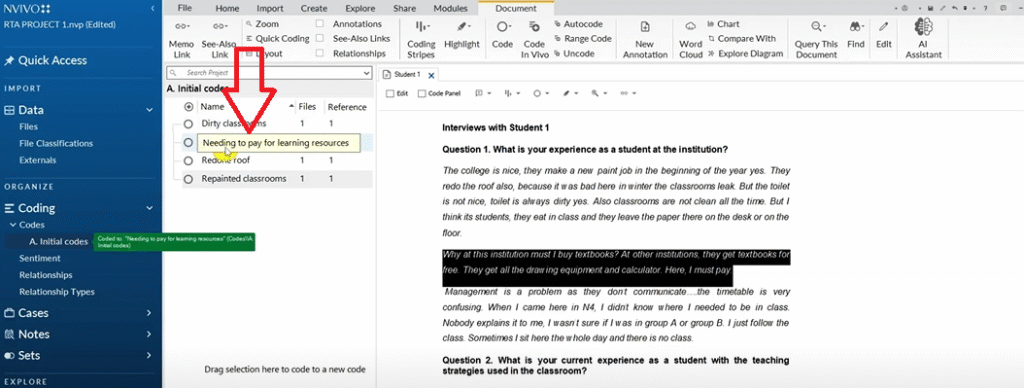
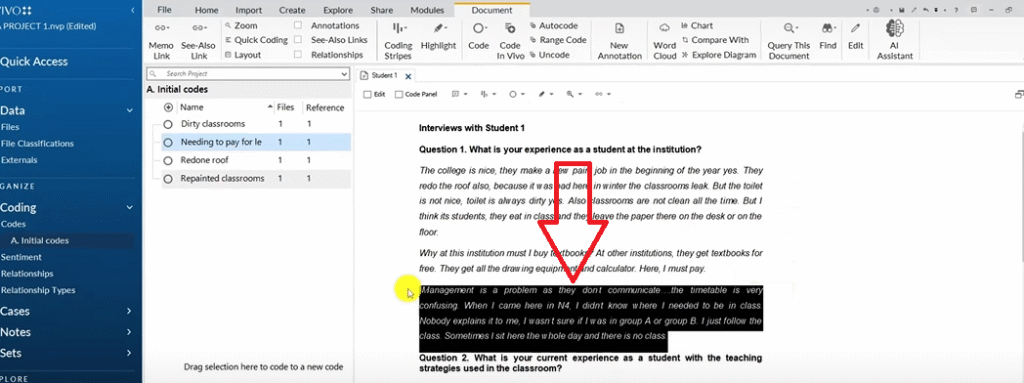
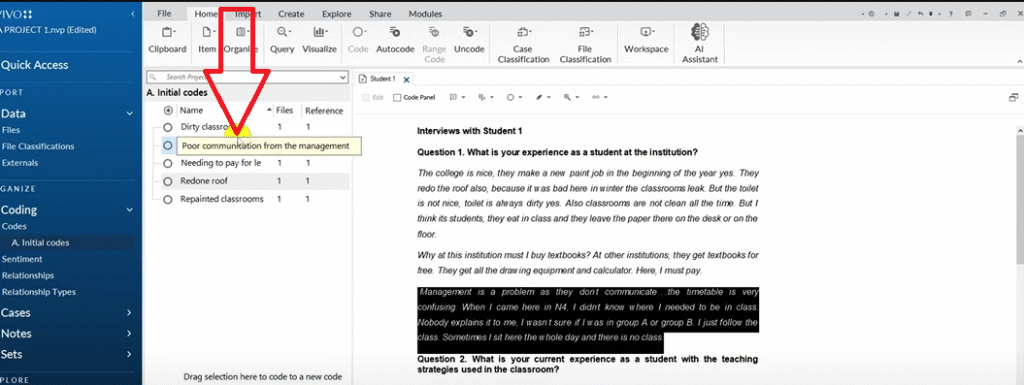
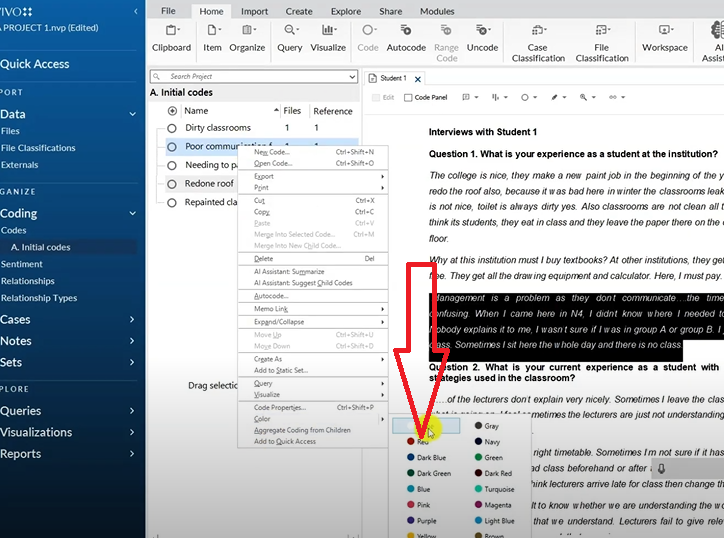
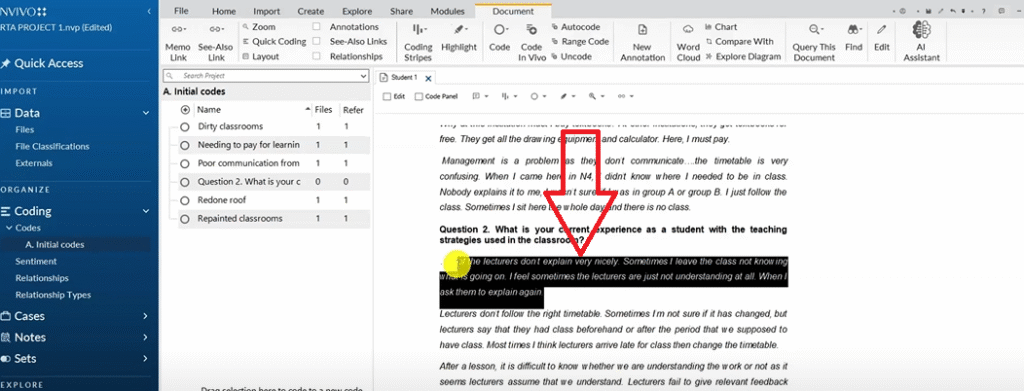
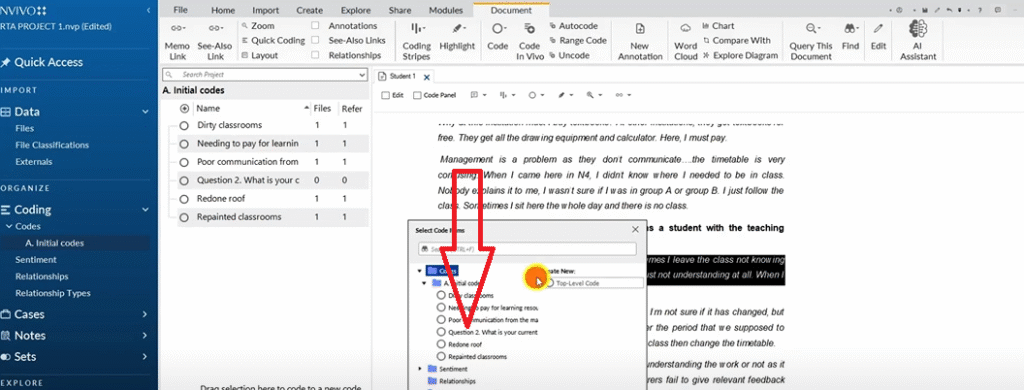
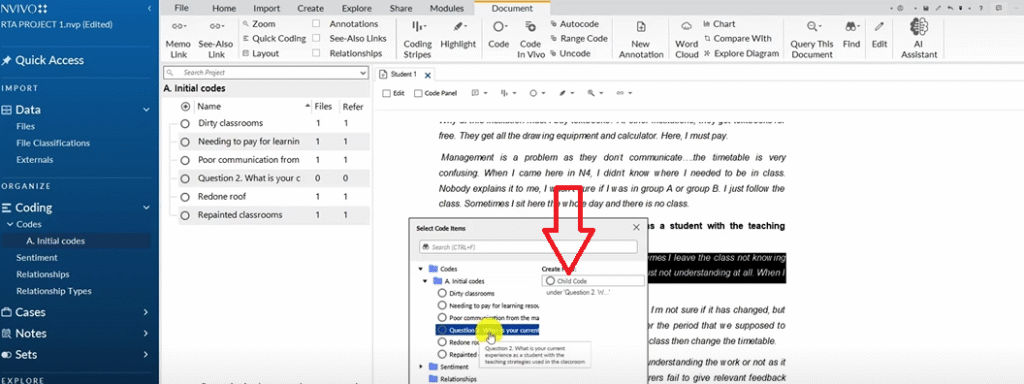
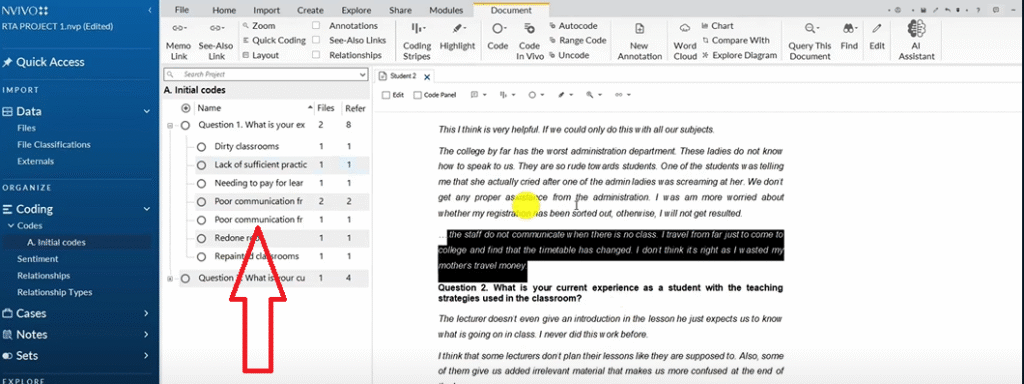
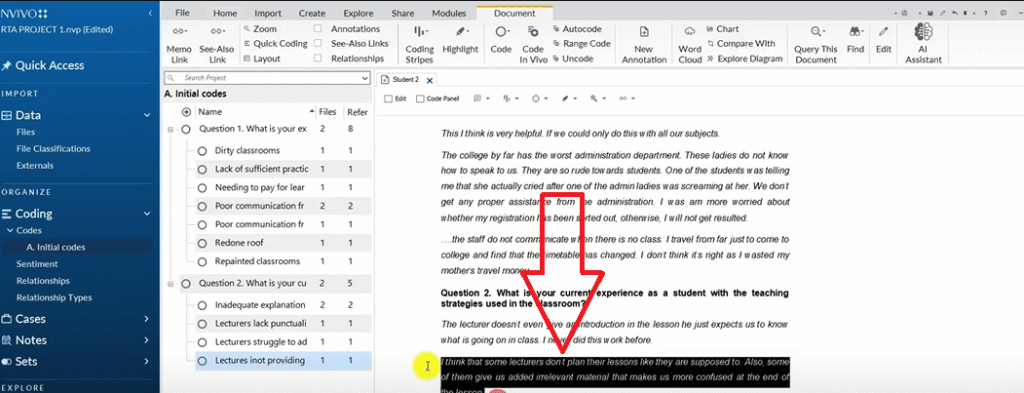
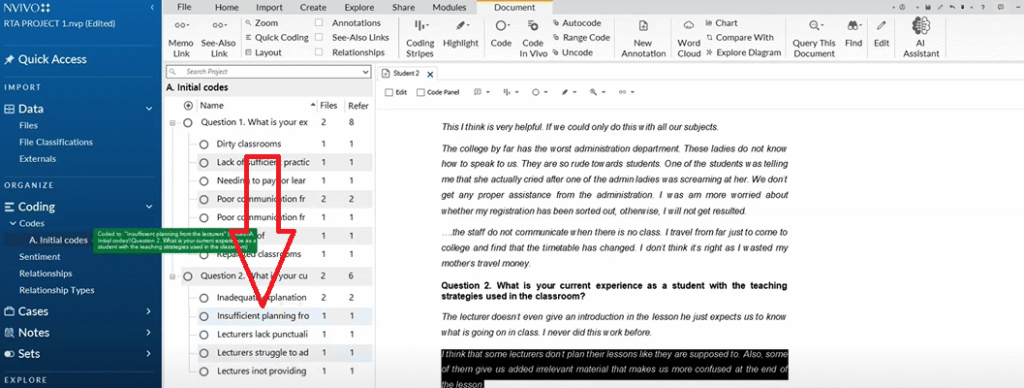
When you encounter a statement that matches an existing code, drag that quote directly into the existing code rather than creating a new one. The References count on the code will increase, showing how many participants made the same point.
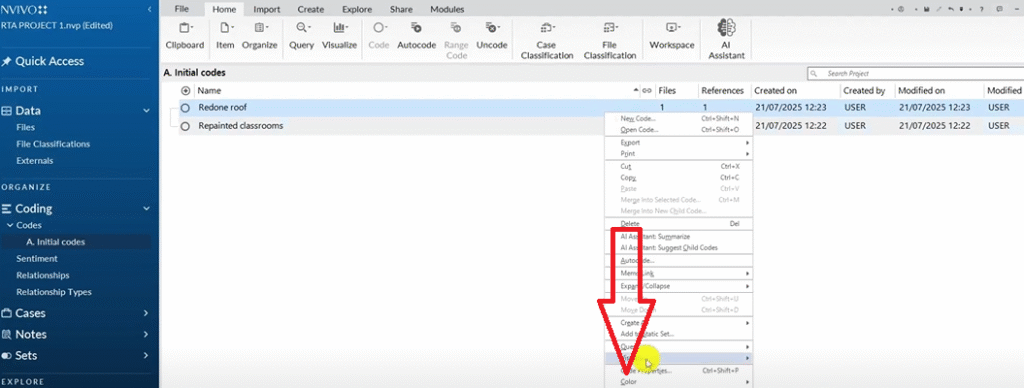
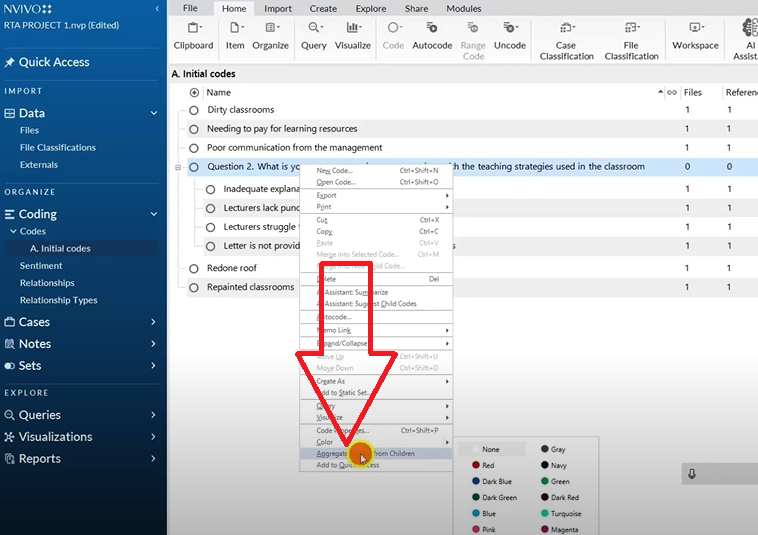
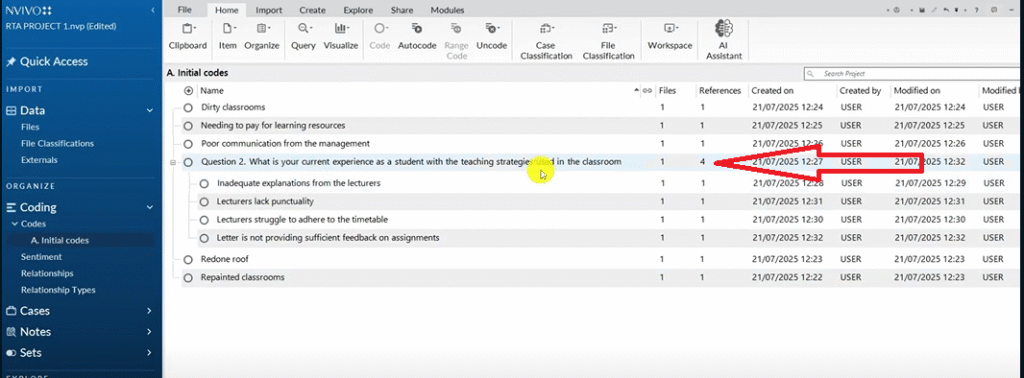
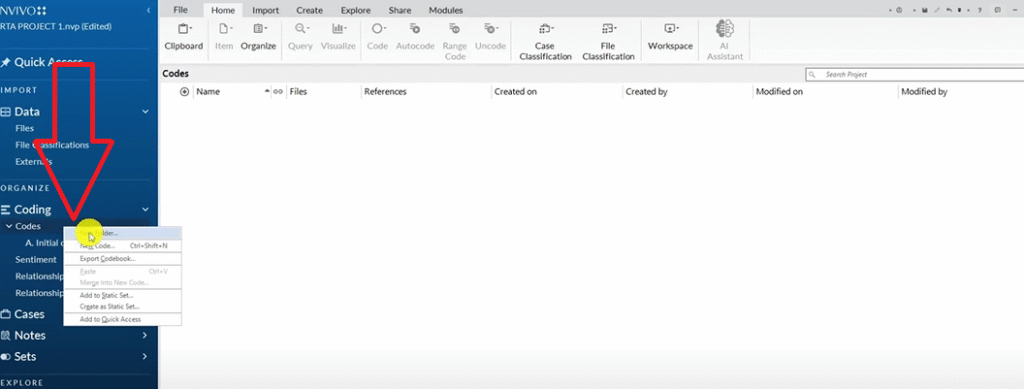
When you’re done coding Question 1 for both transcripts, right-click the question container → Aggregate Coding from Children. For a deeper look at this step, see my full guide on qualitative analysis of interviews in NVivo.

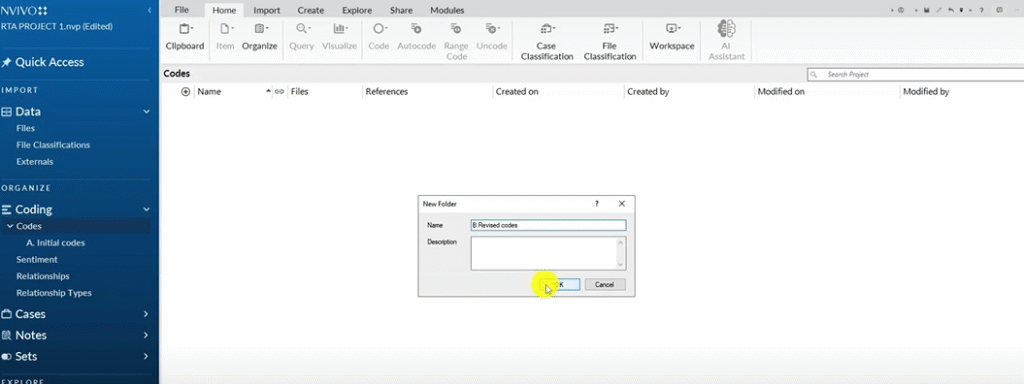
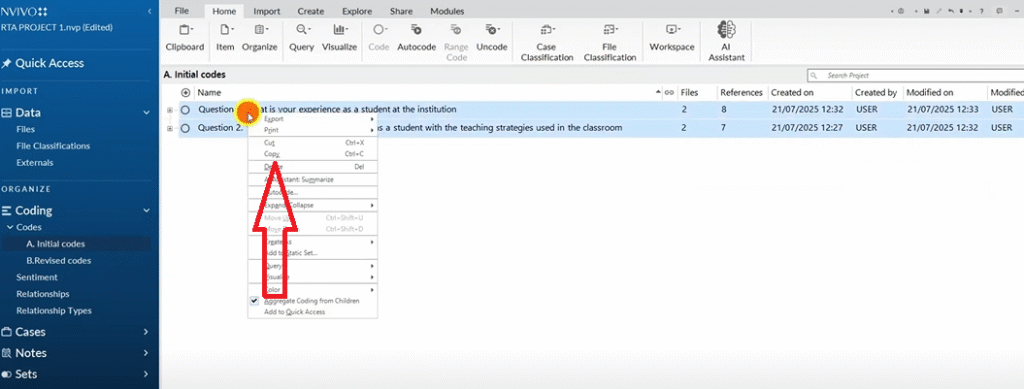
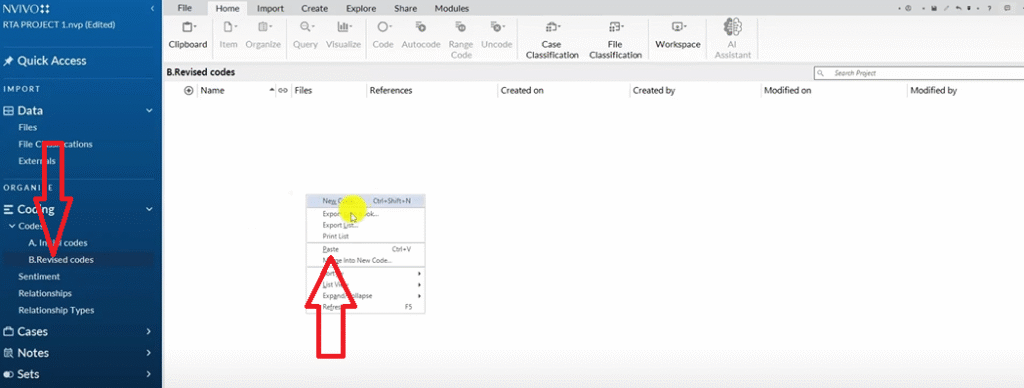
After your first pass, do one additional step I consider essential: code revision. Create a second folder called Revised Codes, copy your initial codes into it, and review each one. Never edit your original folder — always work from the copy.
Step 3 – Generate Preliminary Themes
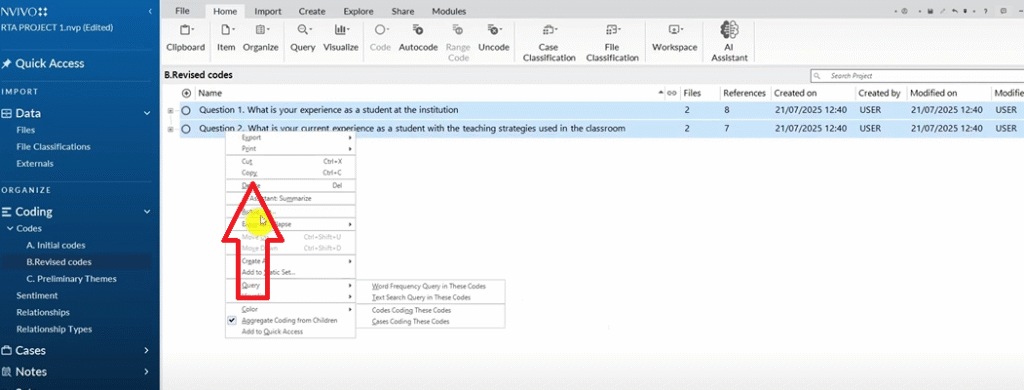
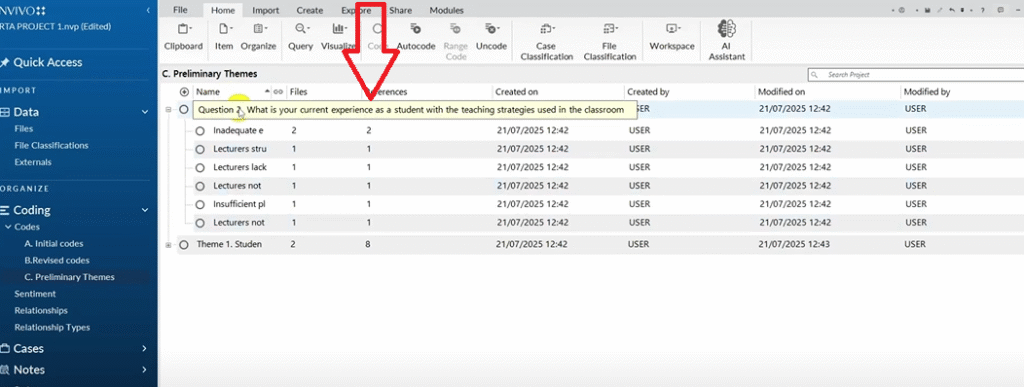
With your revised codes in hand, you’re ready to move from codes to themes.
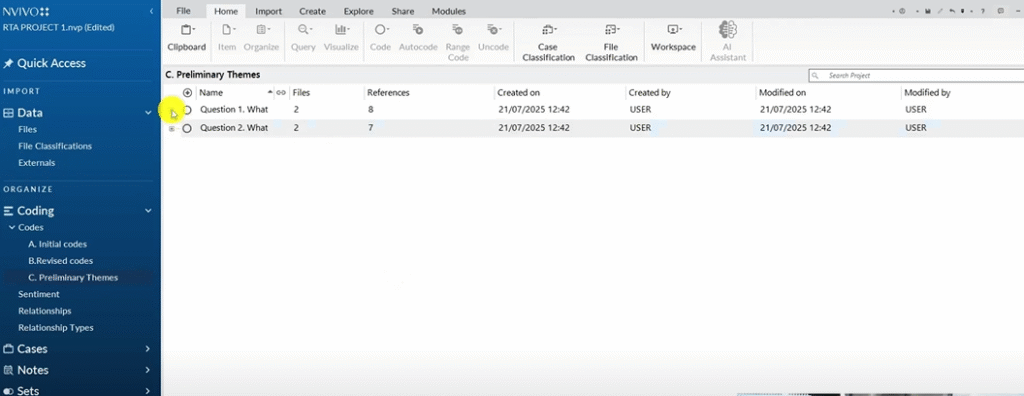
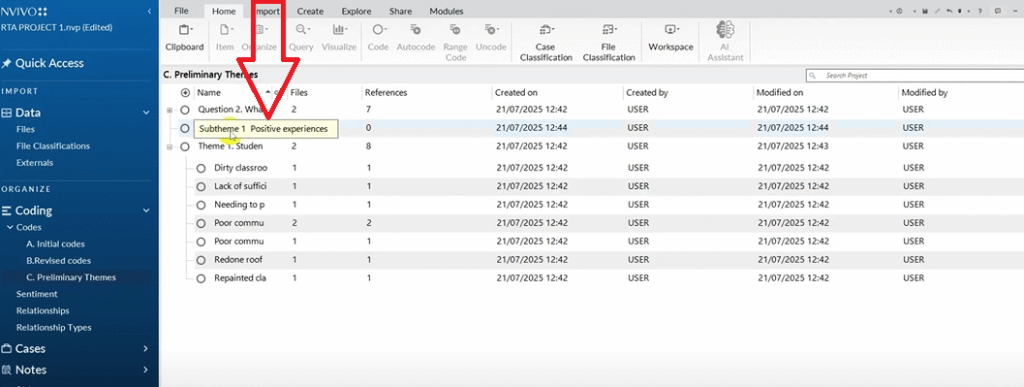
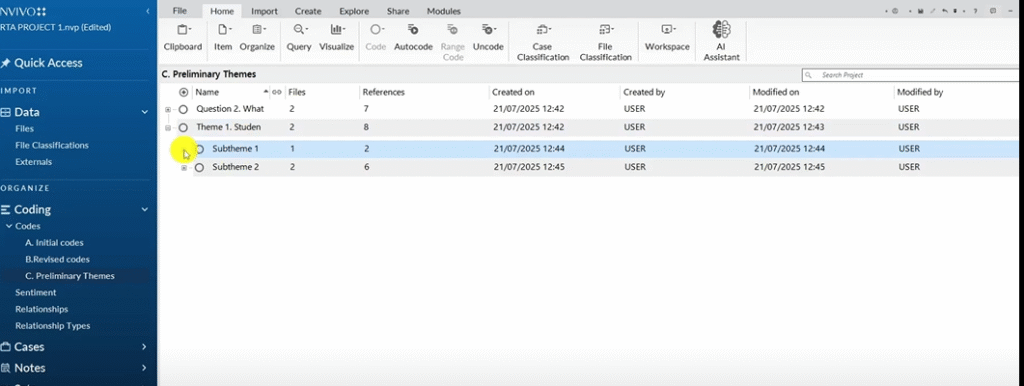
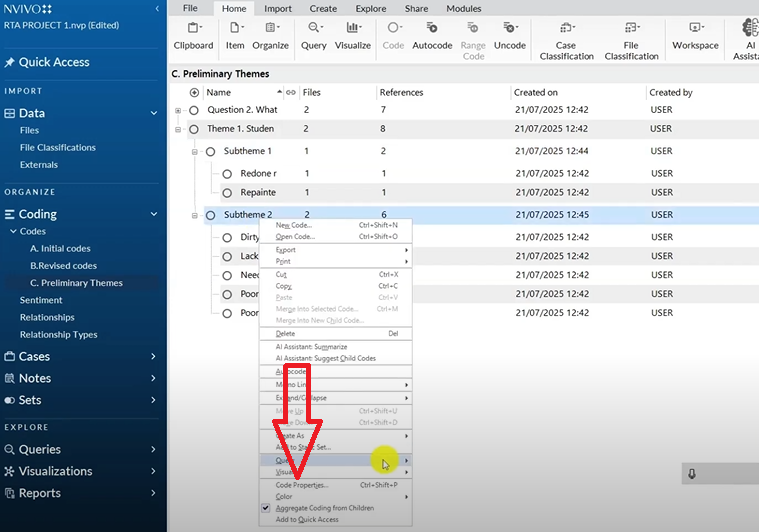
Create a new folder in the Codes panel called Preliminary Themes. Copy your revised codes into it. Now, instead of thinking about which question a code came from, look for patterns of shared meaning across codes.
For this study, two patterns emerged from Question 1 codes:
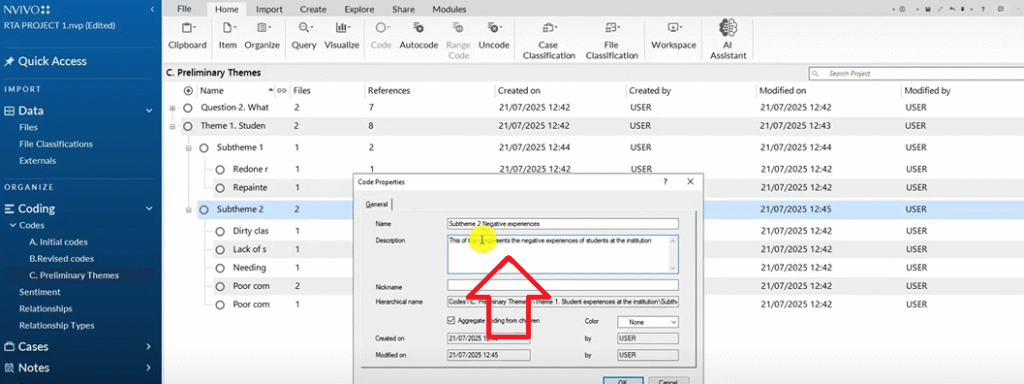
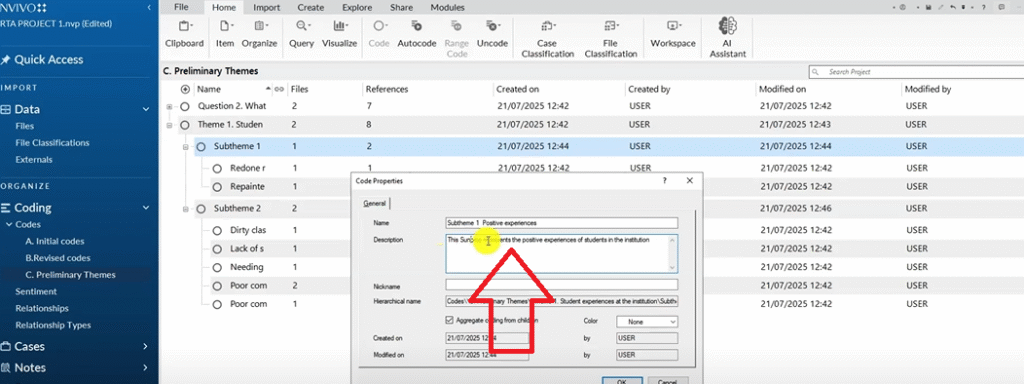
Negative experiences at the institution (dirty classrooms, poor communication, paid resources, lack of practical training)
Positive experiences at the institution (repainted classrooms, redone roof)
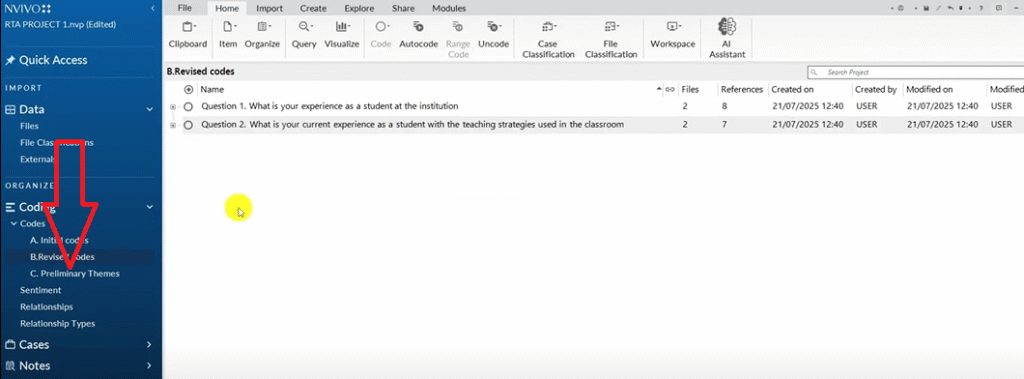
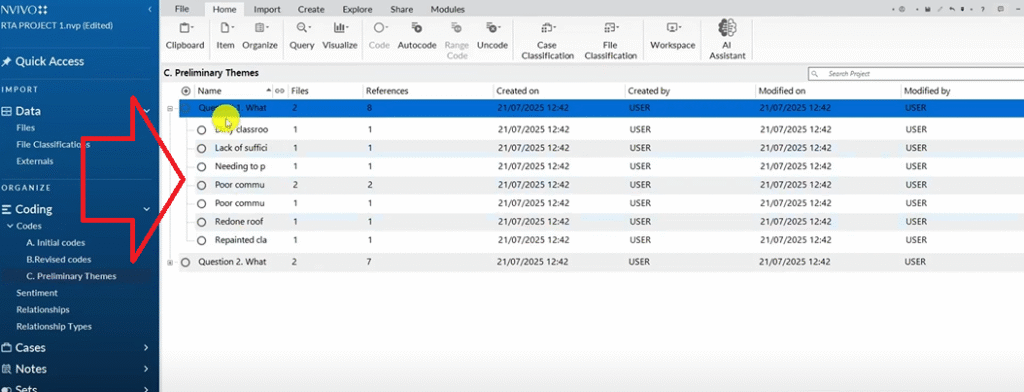
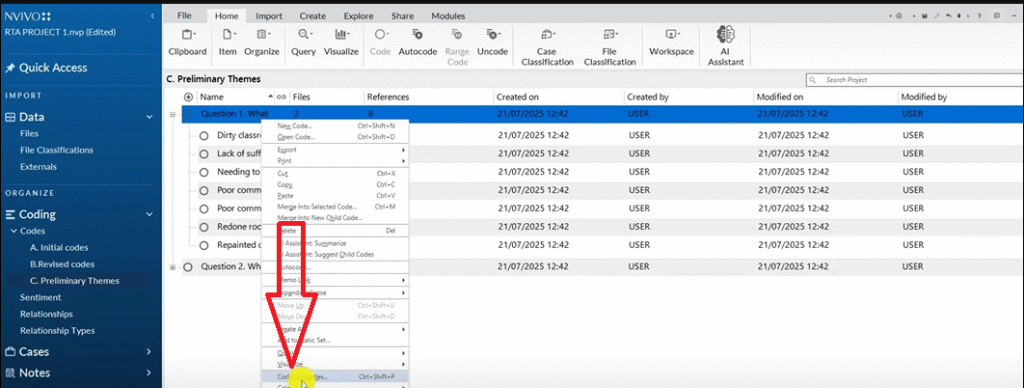
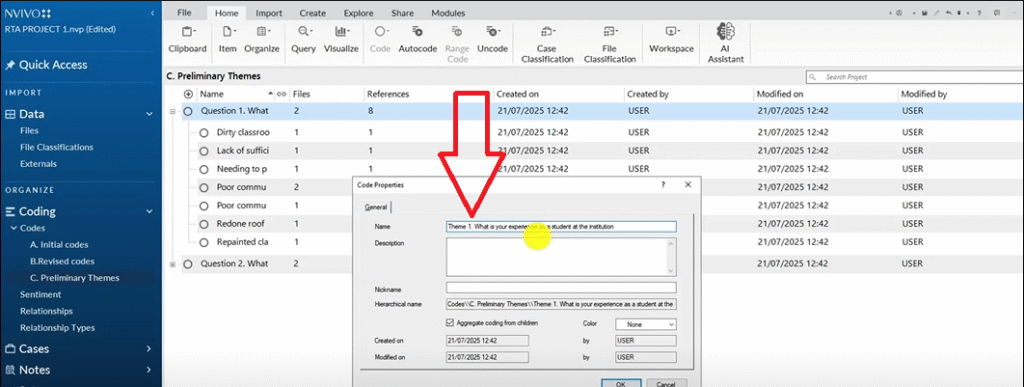
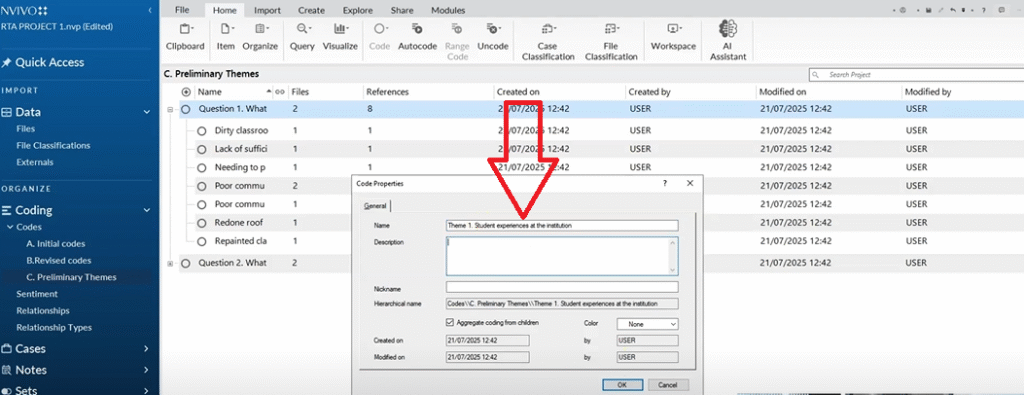
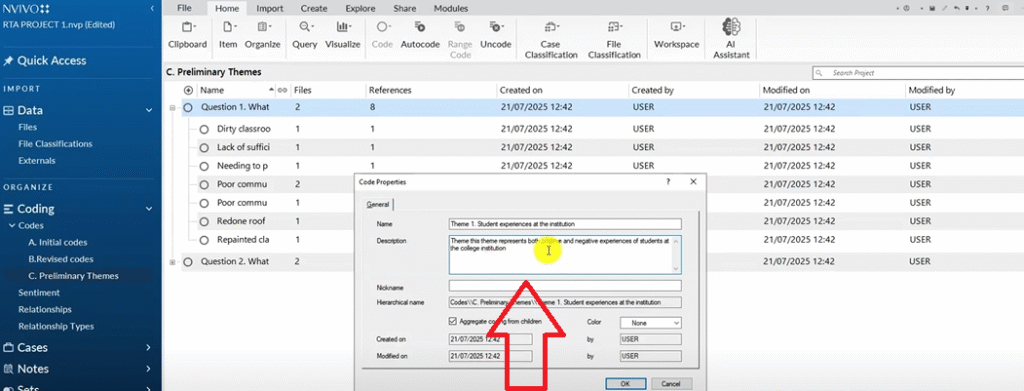

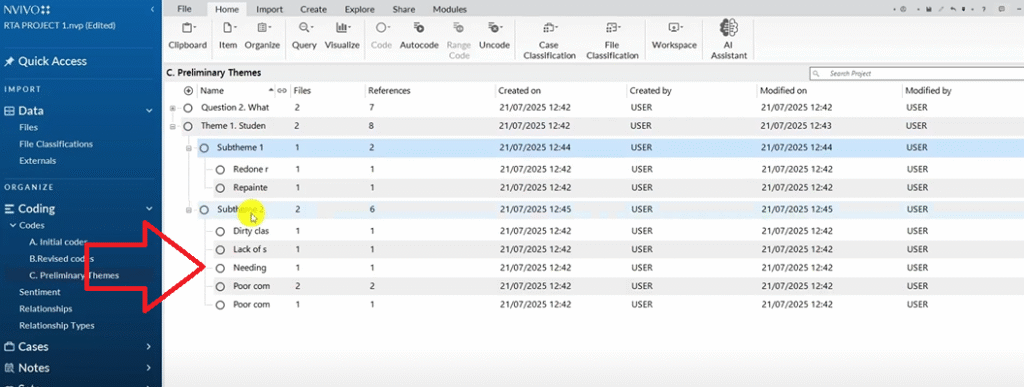
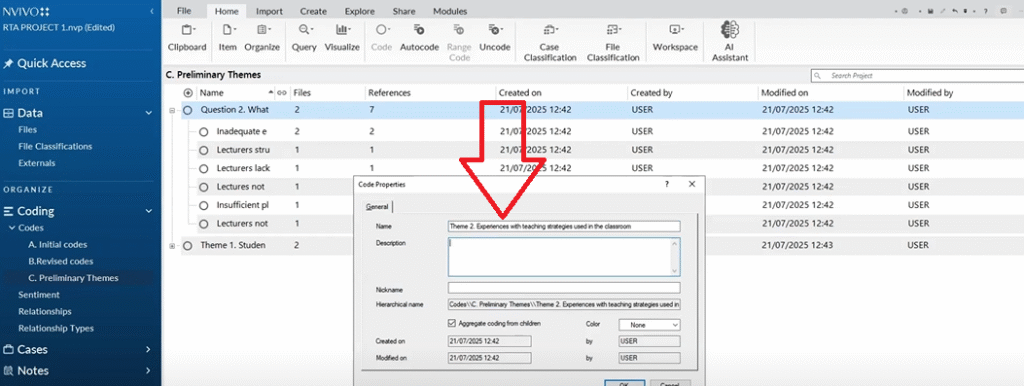
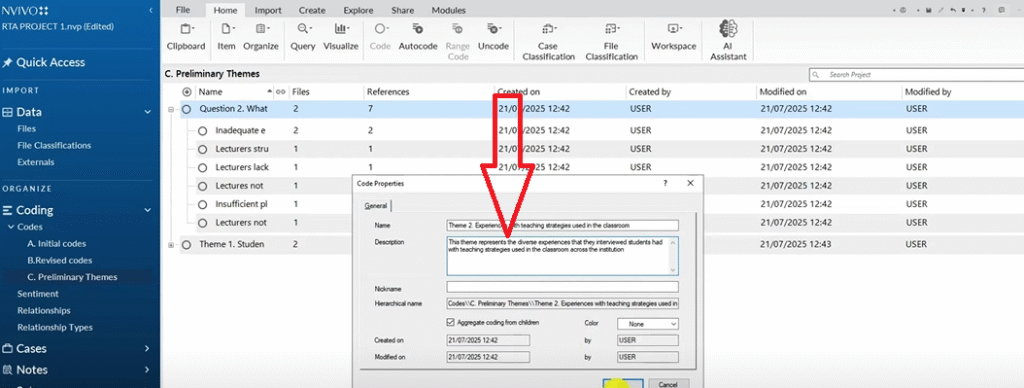
I renamed the Question 1 container to Student Experiences at the Institution and wrote a description: This theme represents both positive and negative experiences students reported at the college.
You can learn how the same process applies to focus group data in my post on thematic analysis of focus group data using NVivo.
Steps 4 and 5 – Review, Define, and Name Your Themes
In practice, Steps 3, 4, and 5 flow together naturally — you’re generating themes, reviewing whether they hold up, and naming them clearly, often in a single pass.
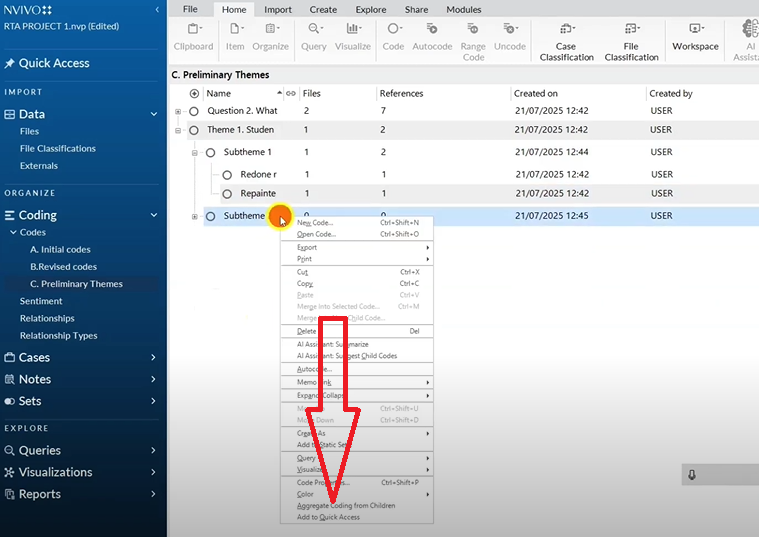
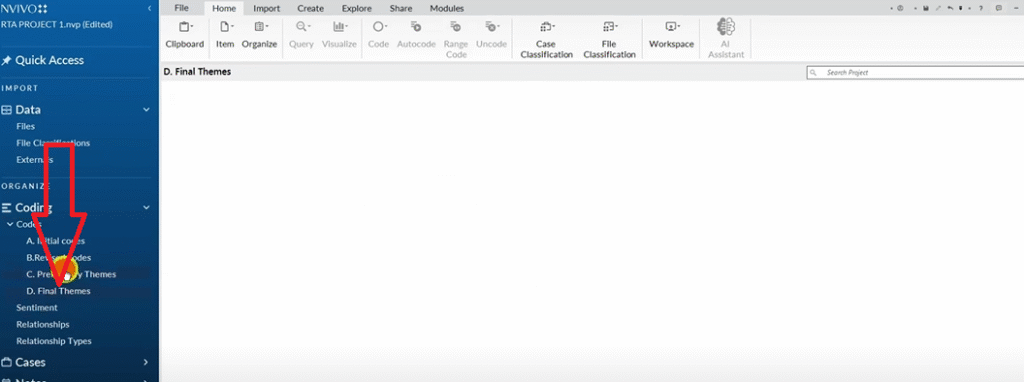
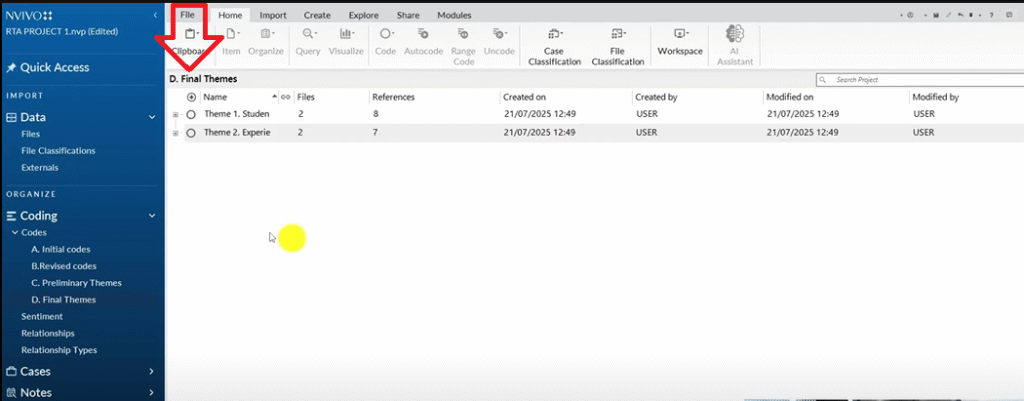
Create a final folder: Final Themes. Copy your preliminary themes into it. Now review everything with fresh eyes:
- Do the codes under each theme actually belong together?
- Is the theme name accurate, or does it need refinement?
- Are there any codes that span two themes and need a decision?
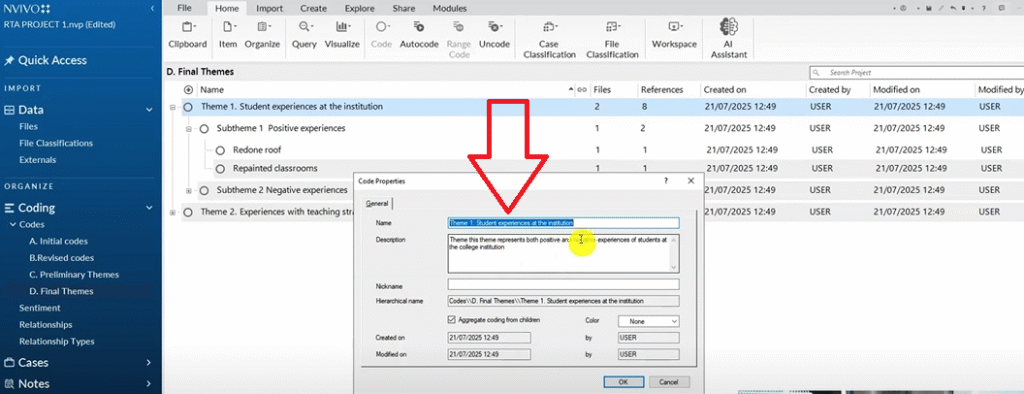
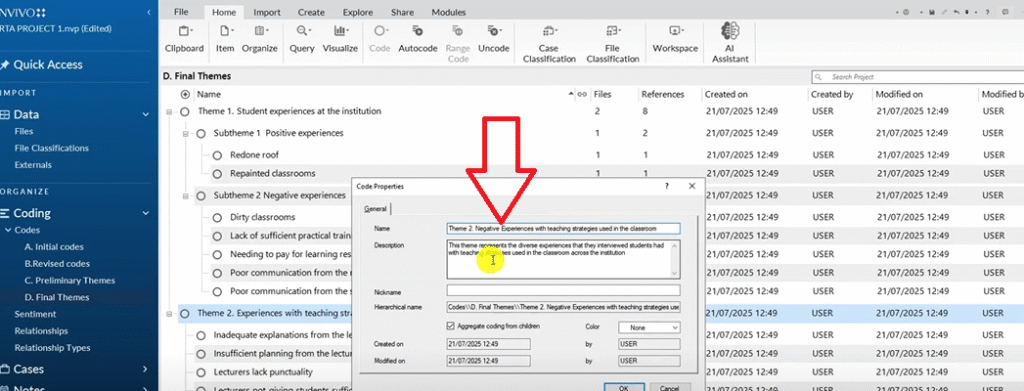
Each theme should have a clear, written description before you move to the report. See my guide on how to report thematic analysis findings in NVivo 15 for exactly how to do that.
Step 6 – Produce the Findings Report
The final step is writing up your findings. In NVivo, before you leave the software, do two things:
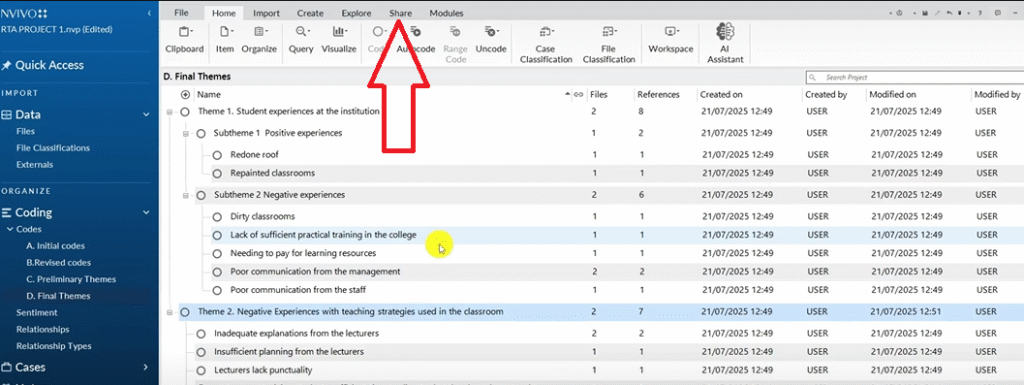
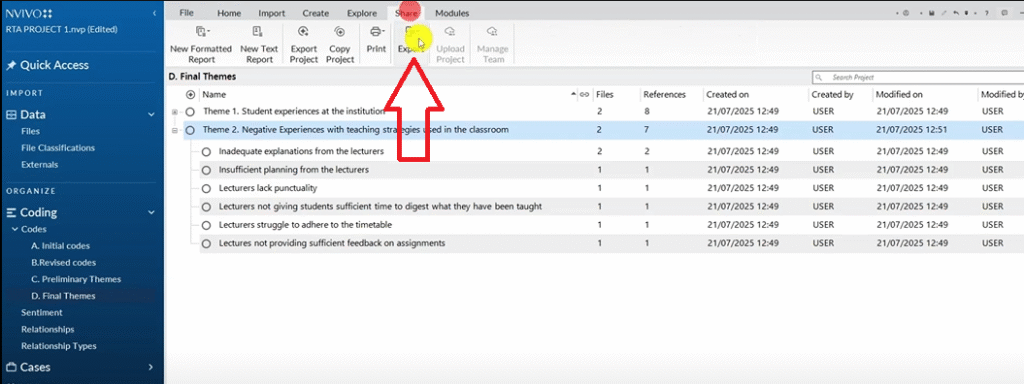
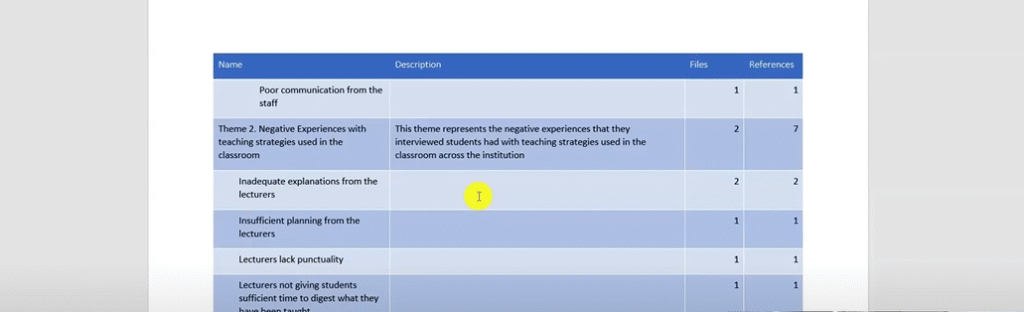
- Export your codebook: Go to Share → Export → Export Code Book. This gives you a document with all your codes, sub-themes, themes, and descriptions — useful as an appendix and as a scaffold for your findings chapter.
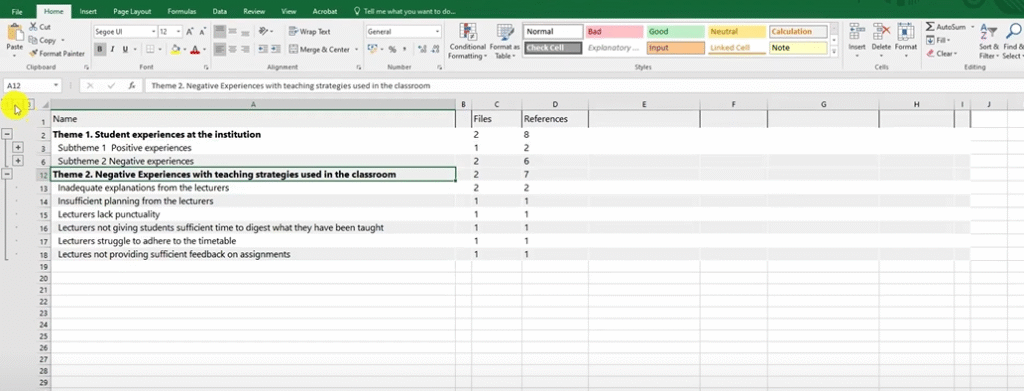
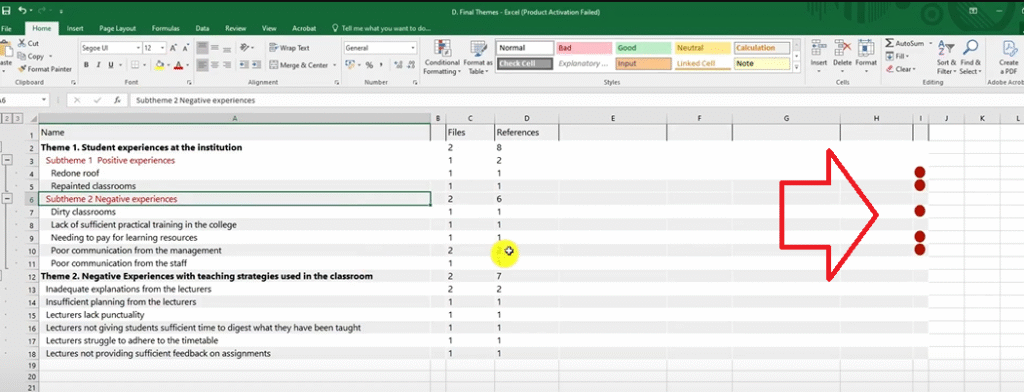
- Export your coding structure as Excel: Select all codes in your Final Themes folder (Ctrl+A), then go to Export → Export List. This produces an Excel file showing your full coding hierarchy, which you can use to build tables in your findings report.
Frequently Asked Questions
What is the difference between reflexive thematic analysis and regular thematic analysis? Reflexive thematic analysis, as defined by Braun and Clarke, emphasises the researcher’s active role in shaping the analysis. Rather than treating themes as things that simply “emerge” from the data, it acknowledges that the researcher’s interpretations, experiences, and biases influence how data is read and coded.
Which version of NVivo should I use? Any version from NVivo 12 onwards works well. This tutorial uses NVivo 15, which includes an AI Assistant feature, but the coding and theme-generation steps are identical across versions.
How many themes is normal? Most dissertation-level studies produce between 3 and 6 main themes, each with 2–4 sub-themes. What matters is that each theme has a clear name, a written description, and is supported by codes from multiple participants.
Do I have to use NVivo for reflexive thematic analysis? No. NVivo is a tool for managing the process, not a requirement. You can conduct reflexive thematic analysis manually or with other software like MAXQDA or ATLAS.ti.
What should I write in my reflexive journal? Date each entry. Write about how you felt during the session, what surprised you, what assumptions you noticed yourself making, and how your interpretations may be shifting. Even a paragraph per coding session is enough.
Key Takeaways
- Reflexive thematic analysis follows the Braun and Clarke six-step framework: familiarize, code, generate themes, review, name, report
- The word “reflexive” means you actively document your own influence on the analysis through a reflexive journal
- In NVivo, organise your work across four folders: Initial Codes → Revised Codes → Preliminary Themes → Final Themes
- Use either color codes or questions-as-containers to track where codes originated
- Always export your codebook and coding structure before writing your findings chapter
Need Help with Your Qualitative Analysis?
If you’re working through reflexive thematic analysis for your dissertation and need expert support, I offer a done-for-you NVivo thematic analysis service that takes your transcripts and delivers a complete, academically sound findings report. You can also book a consulting session if you’d prefer to work through the analysis together. Reach out at bernardmugo@survivingresearch.com — I’m happy to help.

Pingback: How to Create a Word Cloud in NVivo After Thematic Analysis -
Pingback: 12 Qualitative Coding Mistakes (And How to Fix Them) -